This posting went almost unseen when I first put it up, six months ago, so after reworking it a little I’m re-posting it. The changes are cosmetic so if you feel like you’ve seen it before you probably have.
If you carve marble or alabaster you know about bruising. I’m talking about the indelible milky spots that result from hitting the stone with something hard. It goes by other names as well; you may see it called stunning or shocking the marble in old books. This post is about the mechanics of bruising. In the next post we’ll go back in time and see why this has not been an issue for sculptors in every era.
Bruises are clouds of microscopic cracks in the uniformly crystallized marble. Even though marble and limestone are chemically very similar, limestone doesn’t bruise like marble because unlike marble, limestone has not been metamorphosed into a uniform crystal structure. Limestone is an aggregate of fragments of shells and other calcium carbonate debris glued together by a matrix of tiny crystals. It’s somewhat similar to concrete except that the aggregate in limestone is shell fragments rather than sand and gravel. This makes bruising less of a problem for two main reasons. Firstly, the grainy structure makes limestone more opaque than marble so you don’t see below the surface. More importantly, the chunky structure physically blocks the transmission of small cracks, which have a hard time jumping across the boundaries between the discrete components of the stone. (We’re talking about most limestone here–there are some kinds this doesn’t apply to.)
What makes bruising such a bane is that they can extend deep into the stone. Let’s take a look at what’s going on under the surface.
Experiments
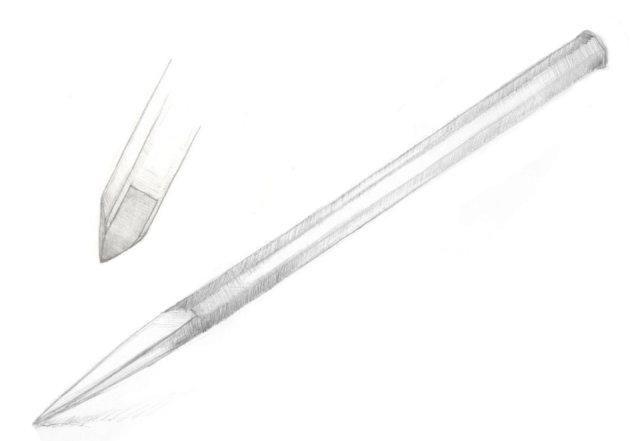
The pictures below are a piece of fine, hard, Italian marble that I’ve deliberately bruised in order to demonstrate the phenomenon. I’ve made these with pointed tools but a hammer will do the same.
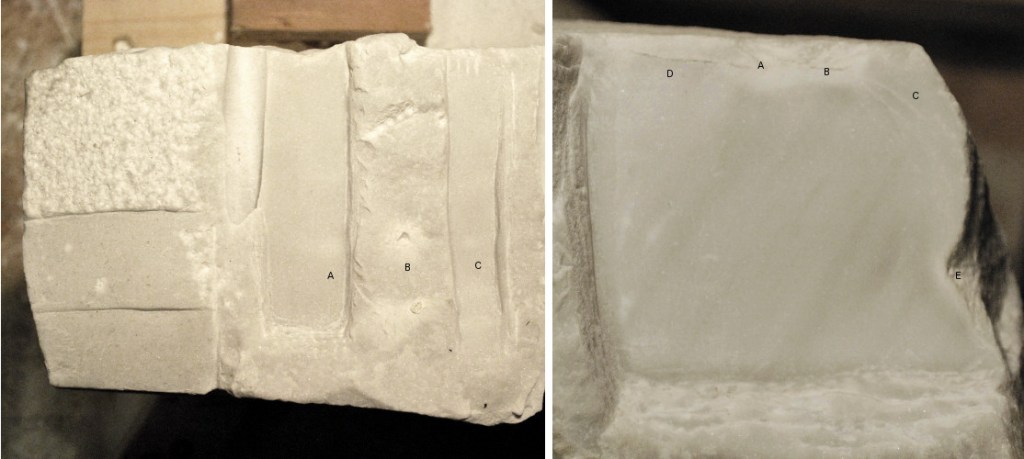
Punch
The right half of the picture on the left shows the effect of driving a punch straight in. When I started, the three vertical bands of stone marked A, B, and C were all at the level of the punch mark labeled B, which is on a freshly split face.
I made strikes with a punch into the fresh face at A, B, and C. I tried to hit the punch with exactly the same force for each mark. I didn’t use a great deal of force–maybe a six or eight inch swing. Just above B is a mark in the original fresh surface. You can easily see the white halo around the crisp hole left by the point. A, B, and C looked exactly the same before I started shaving away stone over A and C with a straight chisel to show how deep the bruises go.
They go deep! With a chisel I shaved away approximately 3/8 of an inch of stone from where the A mark was without reaching the bottom of the bruise. You can still see a white cloud about a quarter inch in diameter just above the A. Then I shaved about 1/2 of an inch of stone from mark C and you can still see a smaller white dot. It’s just above and to the left of the letter. The more you polish, the more that spot will show.
Claw Chisel
While I was at it I made similar marks with a five tooth claw chisel. You can see the mark near the top of the stone above B. I pounded it directly into the surface at the top of the block in the same three relative locations, with approximately the same force as I used with the punch. (You wouldn’t normally use a claw chisel straight in like that, but at an angle.)
The marks are clearly visible directly above the B punch mark at the top of the block. With the force spread among five teeth, the bruising is more superficial. There is just a trace of a cloud on the A side and the bruises on the B side it have been completely removed.
Bush Hammer
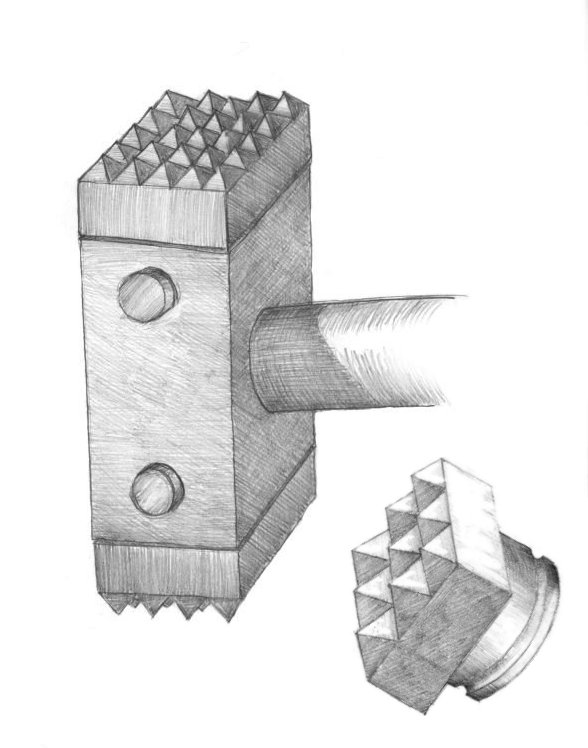
The far left side of the left hand picture shows an area spanning the entire block from top to bottom that was bushed with a pneumatic bush hammer. Then, as in the other examples, I shaved about 1/8 of an inch of stone away in the middle section and about 1/4 inch from the bottom section. The middle section still shows numerous bruises that go deeper than 1/8 inch. At one quarter inch the bush-hammer marks are almost gone but you can still make out a couple of bruises if you look closely. If you use a bush hammer with fine points and don’t hit so hard you’ll get shallower bruises. Fine bush hammers are called frosting hammers because of the granular white surface they leave. Not all bush hammers have a rectangular grid of pyramids—the striking face can be a ring or other linear shape too.
Reprising Punch Marks
The right-hand picture shows a vertical cross section through three straight-in punch strokes to expose more of the 3-d structure of the marks. It’s the same stone as before but a different spot. and I tried to match the force I used in the first example. Two punched craters on the top are labeled A and B, and the one on the side is labeled E. On the bottom and left side of the picture you can see the marks left by the chisel as I shaved down the square of stone.
The area of stone that has been cut down is about two and a half inches square, and I smoothed it with #220 grit wet/dry paper and wet it to show the surface and sub-surface details better. Note the white clouds below and around A and B, to a depth of about 1/4 inch below the deepest point under the punctures. There is a thinner rim of white under E.
Sub-surface cracks marked D and C can be seen radiating out from A and B in both directions. At least three parallel white flaws originating at B show up under C. There are also some very faint, white, crack-like flaws extending down into the stone below and to the right of A, going at least three times as deep as the white cloud.
Note that crack marked D, seen on the left, is open, as can be seen from its dark color, which is residue of the black wet and dry sandpaper. The stone above would have come off it I’d hit a little harder but it feels very solid. The multiple cracks marked C did not actually open the stone, as can be seen from their pure white color, but they still permanently disturbed the crystal structure. If the stone were to be cut away horizontally deeply enough to remove the cloudy areas, as we did with the marks pictured in the other photo, these cracks would still appear as a cluster of small white dots. If you zoom in you can see that there’s actually a sort of starburst of very faint bruising under the whole area especially around a vertical line between the two impact points and off to the left on the A side.
One of the most interesting things the experiment exposes is how different is the effect of the impact at point E. You can from the banding in the stone that the drift runs diagonally from lower left to upper right. Therefore, the direction of impact at A and B is almost into the grain direction and the impact at E is almost perpendicular to it.
Punch mark E removed the a lot of stone, yet produced the shallowest cloudy area. The white region under E is also thin and parallel to the broken surface, rather than puffy cloud, and there are no obvious cracks. One experiment doesn’t prove much, but this may be because the cracks don’t propagate as easily across the drift direction, much as they don’t propagate easily across the discontinuities in limestone. Either way, the lesson here is that the depth of bruising from an impact in one direction is not a reliable indicator of what you will find when you come at the stone from another direction.

does bruising g mean the marble was incorrectly handled. My marble light shades have white fits all around the top that look like dirt when the light is turned on. They are not random but appear man-caused.
LikeLike
It’s hard to say without seeing them, but they usually look like milky clouds. But now that you mention it, I’m not sure I’ve ever looked at them where light is shining from the other side. But such bruises might have occurred before the stone was even cut into thin pieces. AFAK, there is no way to get rid of them.
LikeLike
white dots*
LikeLike