It took a while to get here, but we’re finally carving marble. The process is to use a pointing machine to locate key points on the plaster model and then transfer them to stone using a pointing machine. There’s a video below of setting it up and starting the carving on the figure.
The Pointing Machine
Here’s some detail on the pointing machine that isn’t in the video. This is a machine I made myself with some non-standard uses in mind so it’s rather heavily built as these things go. It works great, but you could build one more lightly. I’ve used it on a range of sizes.

All easy stuff to buy and work. 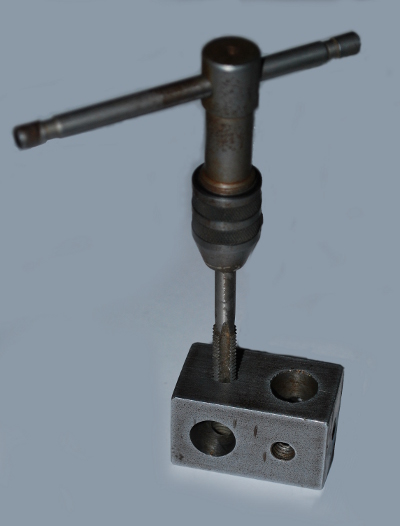
3/8 threaded holes for the bolts. 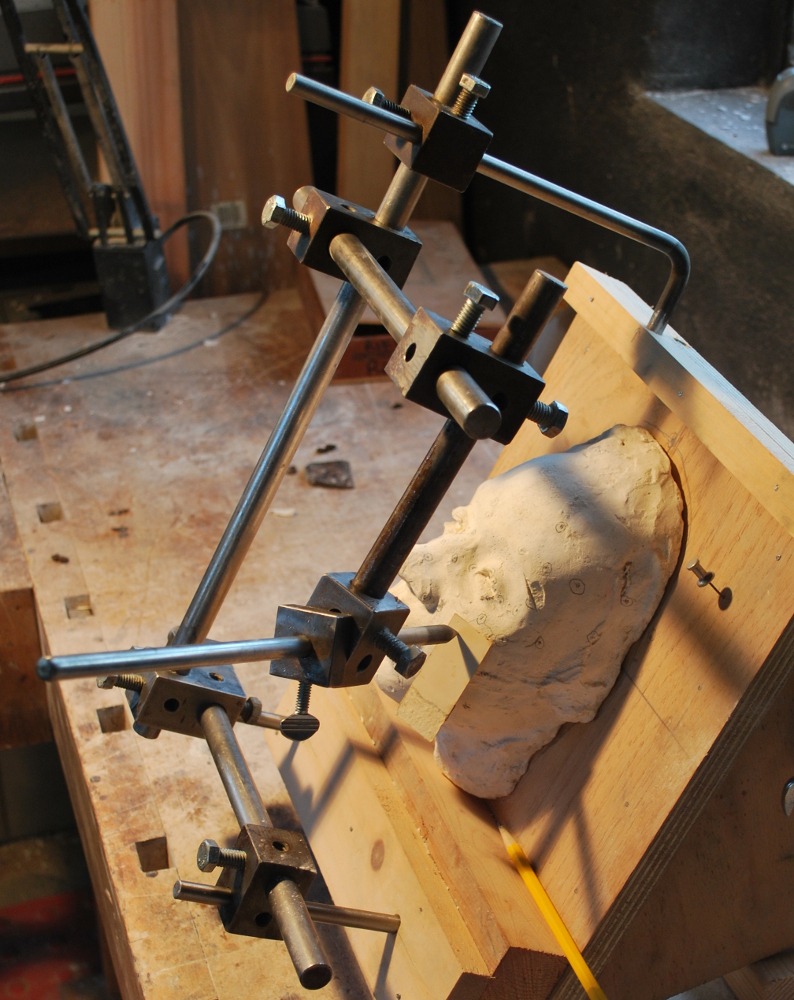
Small. 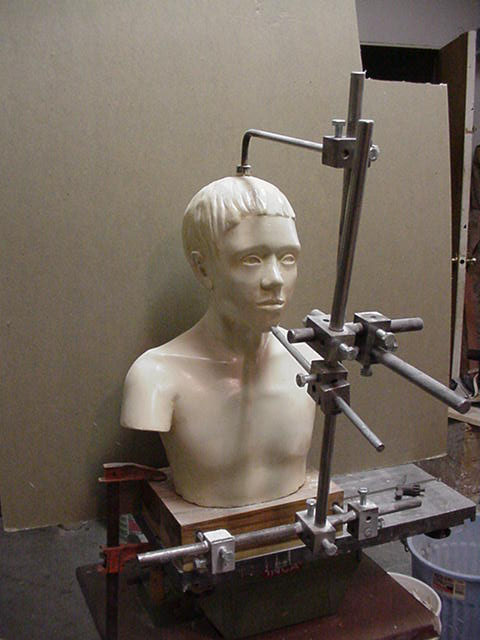
Medium. 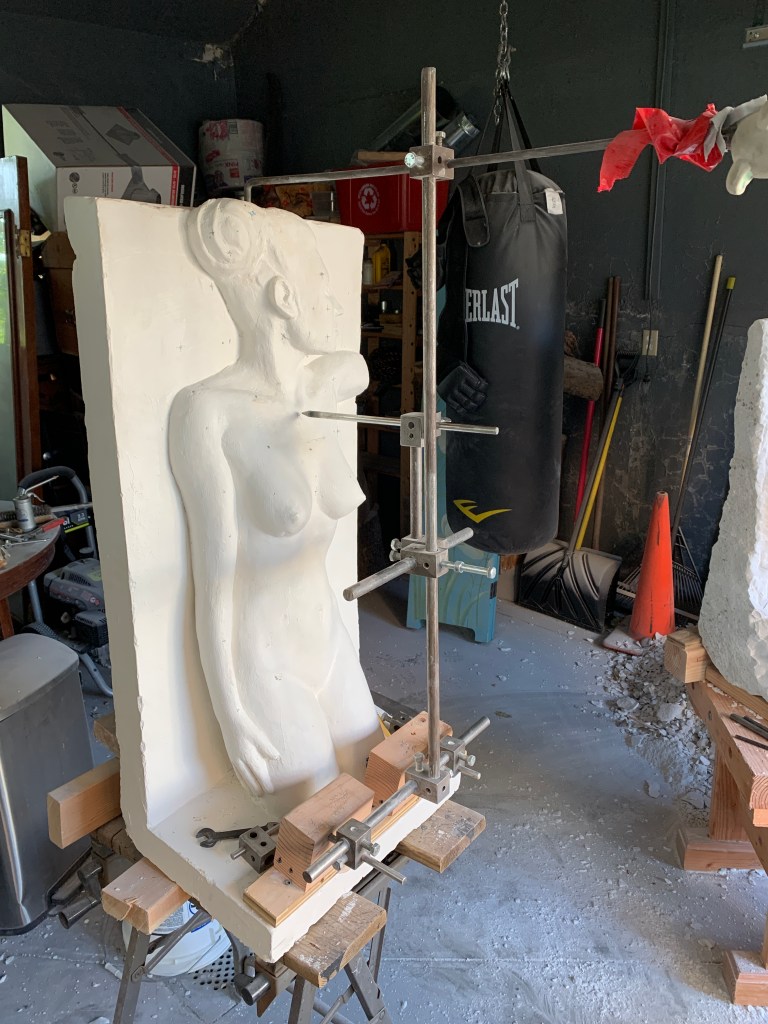
Large. 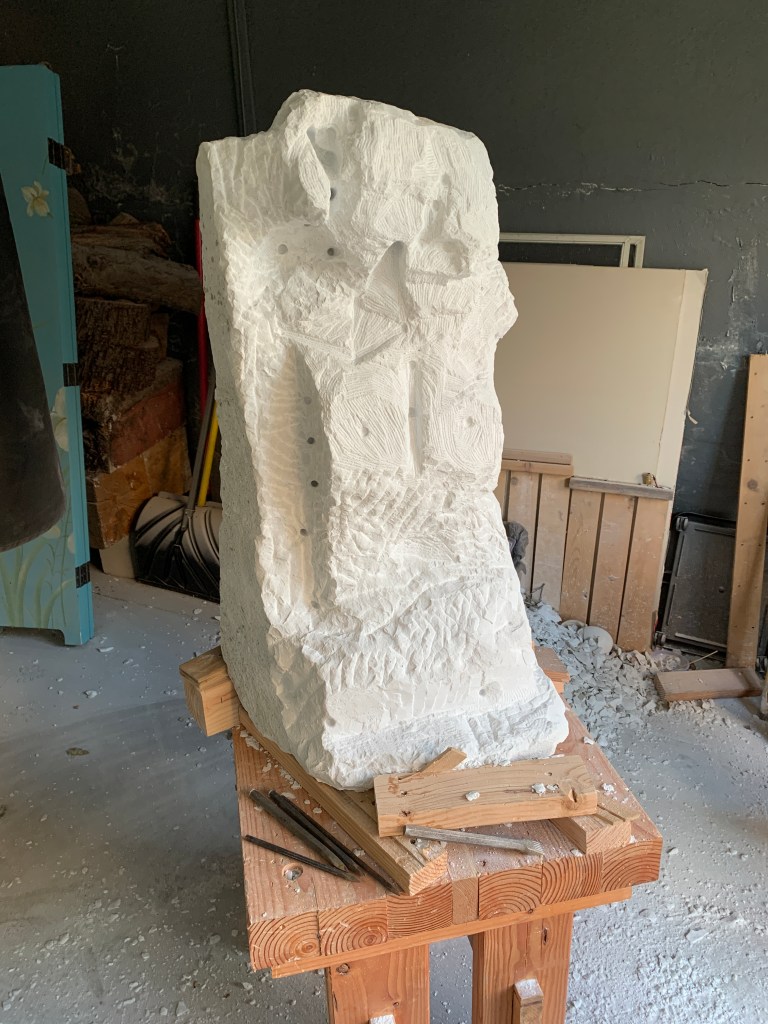
Bulk stone removal plus a few points accurately marked with a drill so they are indelible.
As you can see in the pictures, the pointing machine is just a rigid frame that sits rests in three holes on the plaster original and supports an adjustable armature that allows you to position a pointer to locate some key point on your model, or perhaps a point a few millimeters above the surface. The pointer is the last link in the armature and unlike the other branches of the armature, it isn’t rigidly locked down. It has a mechanical stop that lets it be withdrawn and replaced in exactly the same position.
The machine is adjusted to locate a point on the model, as seen in the pictures above. Then the pointer is withdrawn and the frame is moved to rest in three corresponding holes on the target block. When the pointer is inserted (unless the sculptor has made a disastrous mistake) some amount of stone will block it from being fully inserted. That’s stone that won’t be part of your finished piece.
The sculptor then carves or drills away just enough of the stone that is obstructing insertion until the pointer can slide all the way in. The point is marked on the stone and the process is repeated with a new point. If the surface is almost flat in some particular area, the points needn’t be very close together. You can define a triangular area, for instance, with three points, and then chisel the area out by eye. This process continues until almost all of the surplus stone has been removed. Then the pointing machine is put aside and final tiny fraction of an inch that remains should be just enough for finishing.
You’ll see in the picture above that at this point, in most places I’m hacking away big volumes of stone based on a few points. The strategy is to strip off as much stone as possible with a few points, say, down to within an inch or less of the finished form, before trying to get close with a lot of points.
Dang, That Seems Like A Lot Of Steel For A Measuring Device!
Yes, I guess it is. But this pointing machine is unusually heavily built for a reason.
It was originally designed for use with wood and I wanted to be able to use a drill bit for the pointer so that I could locate each point in one step. So it was not just a pointing machine but an adjustable jig. By using a drill bit for a pointer, I could set the stop, pull it out, and put it in a power drill. That way, I could simply drill all the way in and later just chisel down to the bottom of the hole. That way I wouldn’t have to keep testing the depth to sneak up on the point.
That idea works a lot better for wood than for stone and ironically, the machine has mostly been used for stone. One thing I didn’t anticipate, by the ways, is that the terminal block where the pointer needs to be hardened steel. In no time at all the cold-rolled mild steel had worn so much that it was useless because the pointer flopped around in it. If I end up using it as designed it would need a hardened steel insert pressed into the hole. Actually, it really should have that now because I can feel that even with just a pointer manually inserted it’s worn noticeably.
The key thing is, you can build one much more lightly and it will work fine. Just remember, it can’t be prone to slipping. If it slipped and moved your point in deeper than it should be, it would be a disaster.
It’s all in the video so I won’t elaborate on the process too much here.
I thought about putting some tips on making your own pointing machine here, but had second thoughts. If you already know how to do the necessary operations you will be able to infer everything from the pictures. If you don’t already know how to do it, it’s too much to tack onto the end of this post. I’ll do it step by step in its own post.
