I’ve been pounding away preparing the block and so far, the work has been almost all with the punch, AKA point-chisel, AKA point, AKA bull-point.
Worse Than I Thought
I knew a significant part of this block was sketchy. It had been left in the weather for many years (not by me) and you could clearly see weathering on the side that had been most exposed. This hunk was part of the heel left after larger block that had been sawn up for tiles. You can see evidence of weathering in the pictures below.
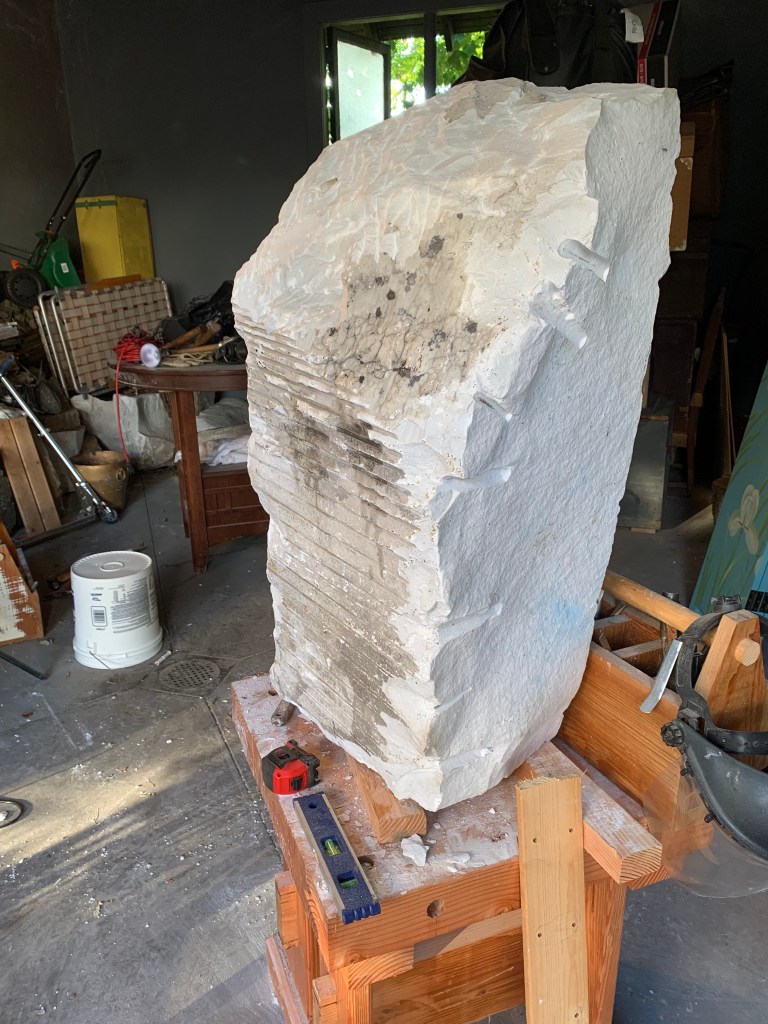
The raw block.
Close up of cracks (wet.) There were many like this. 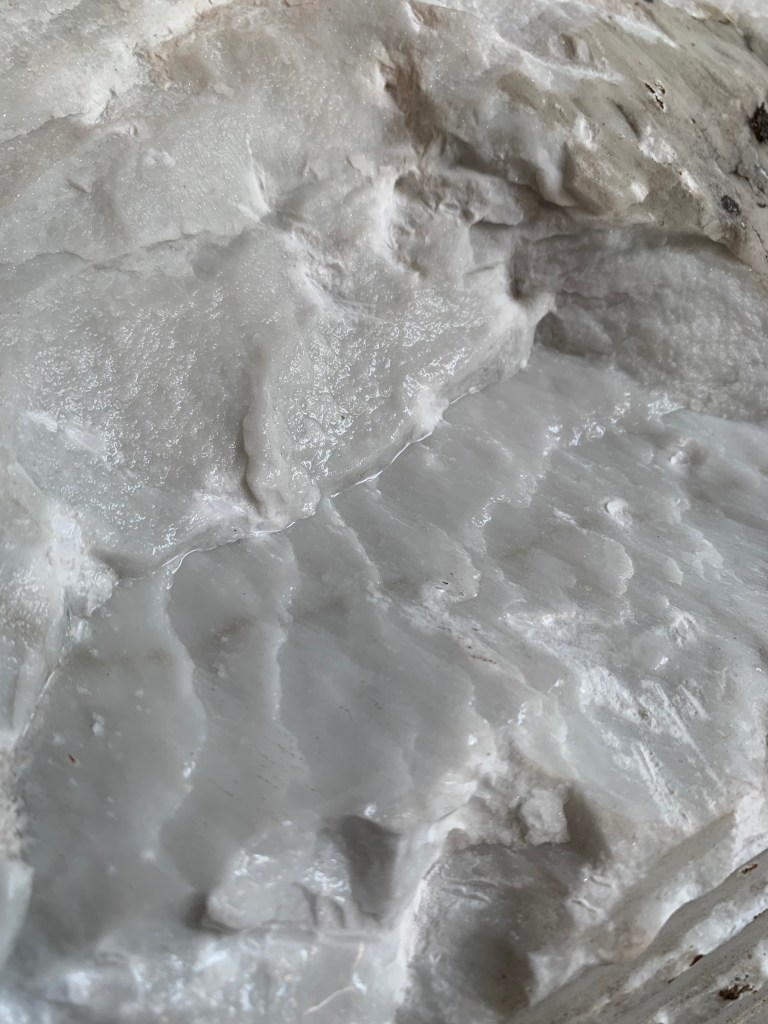
Near the top there is another kind of weathering that might be from before it was quarried. 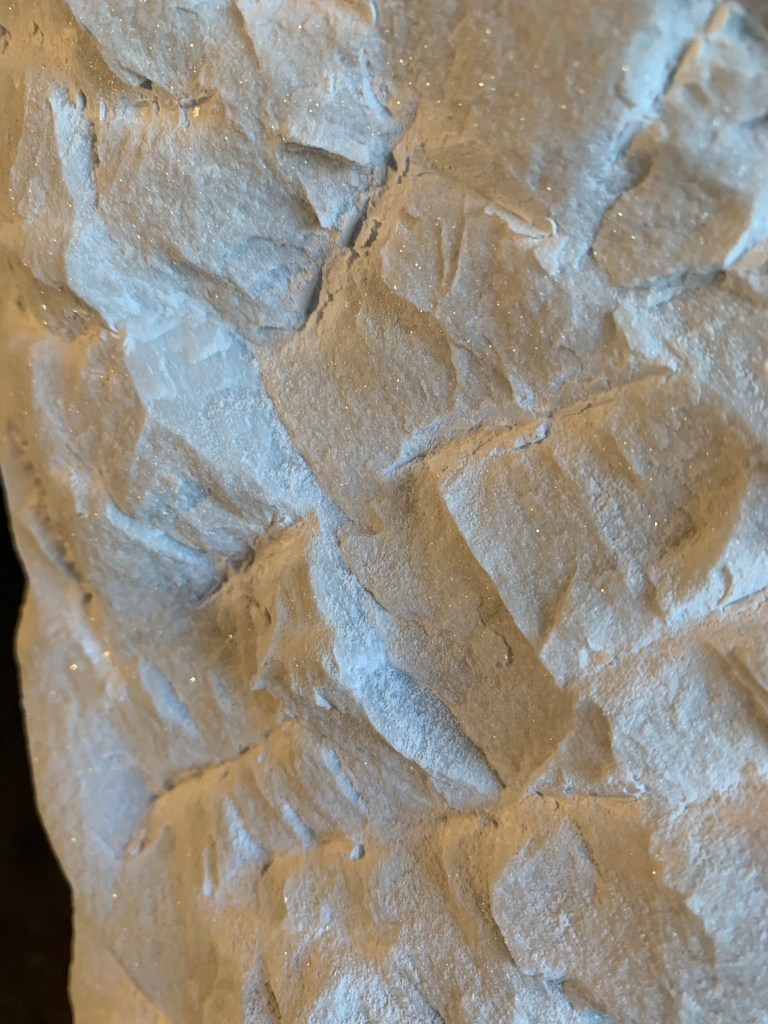
Note the parallel flat ledges exposed as the stone is punched away. The punch would have been coming at the stone from upper right to lower left. The flat spots are cracks interrupting the break from the punch. Healthy stone doesn’t do this.
I knew some of the block would have to be stripped off to get down to dependable stone but I underestimated how much. The sketchy part went so deep that I ended up not using one of the four sides as the front, and instead trimmed the block down to get a face that was more or less parallel to a diagonal. The block started at approximately 1000 pounds, so I’m guessing I wasted off at least 400 pound before carving even started. By the time it’s actually carved, probably 2/3 of the original block will be on the floor. Fortunately, the model is extremely frontal and can accommodate the thinner stone.
The Tool
The punch has many minor uses, but it is primarily use for hogging-off waste quickly. You typically drive the punch along at about a thirty-degree angle to the stone, creating a continuous furrow by knocking off a line of big chips. Then you move over about an inch (when using a big punch) to make another furrow and do it again, and again, and again leaving a surface that looks like a plowed field.
The furrows are perhaps three-quarters of an inch deep and each pass removes about half to three-quarters of an inch of stone. For this heavy stone removal, the furrows are about an inch apart and I count about 100 hammer blows to move the punch one foot. So taking a square foot of stone down 3/4″ takes about 1200 blows with the hammer. A cubic foot would be about 16 such layers, so that’s 192,000 hammer strikes to remove a cubic foot of stone. It’s a workout. The original block is about five or six cubic feet so removing half of the stone from this block would require more than half a million whacks! (We’ll talk about power tools later.) Yet, when you get going the stone seems to melt away.

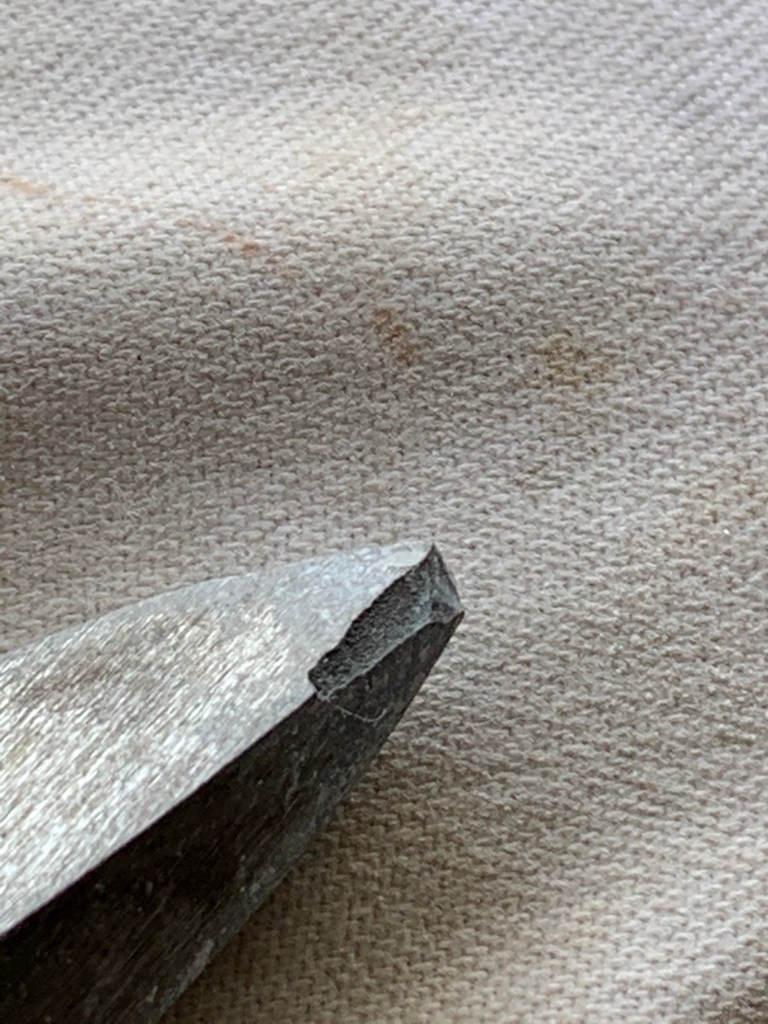
The punch is deceptively simple looking. It’s a four sided steel spike, often ground from a piece of hex-bar, but sometimes from round or even square stock. (They are usually high-carbon or tool steel of some kind–don’t bother trying to make one out of ordinary mild steel. It’s much too soft.) We’re talking about punches for marble, limestone, and other stones of medium hardness; there are punches of other shapes made for both harder and softer stones, but let’s put them aside for now.
The four tapered sides aren’t straight triangles. They curve inwardly slightly at an increasing rate as they come to a point. The subtle curve is truly an elegant invention.
Most obviously, having a wider angle just behind the tip beefs up the tool at the point where it’s under maximum stress. If the sides were four straight, slender triangles, the tip would snap off almost immediately.
Seen from the other direction, the steadily diminishing angle farther from the tip reduces the expansion of the wedge, allowing the tip to go deeper into the stone before the expansive force ruptures the stone. Here is where it gets subtle. Because the cross-section of the punch grows fastest near the tip, the tensile strength of the stone will be exceeded first deep inside the stone and not near the edge. This is highly desirable because it tends to blow out a large conical chip, rather than prying a small chip out from the edge.
Note how most of the chips pictured below exhibit a small notch where the point penetrated the surface. You can see by this that the break didn’t start at the edge, but deep inside, blowing out a cone that includes the entry point on a large arc of stone. Note also that the chips are huge compared to the amount of punch that went into the stone.
The only punch in the picture that is not made for sculptors is the one with the orange protector. Ironically, it is by far my favorite for heavy work despite having cost about eight bucks at the big box store. After the mallet has skidded off the tool and hit your hand a few times you really appreciate the vinyl protector. They sell these for masons, not sculptors, so you will want to tune up the shape with a grinder, but it’s much better steel than any of the punches I own that were made specifically for sculptors.

My primary punch for roughing out. 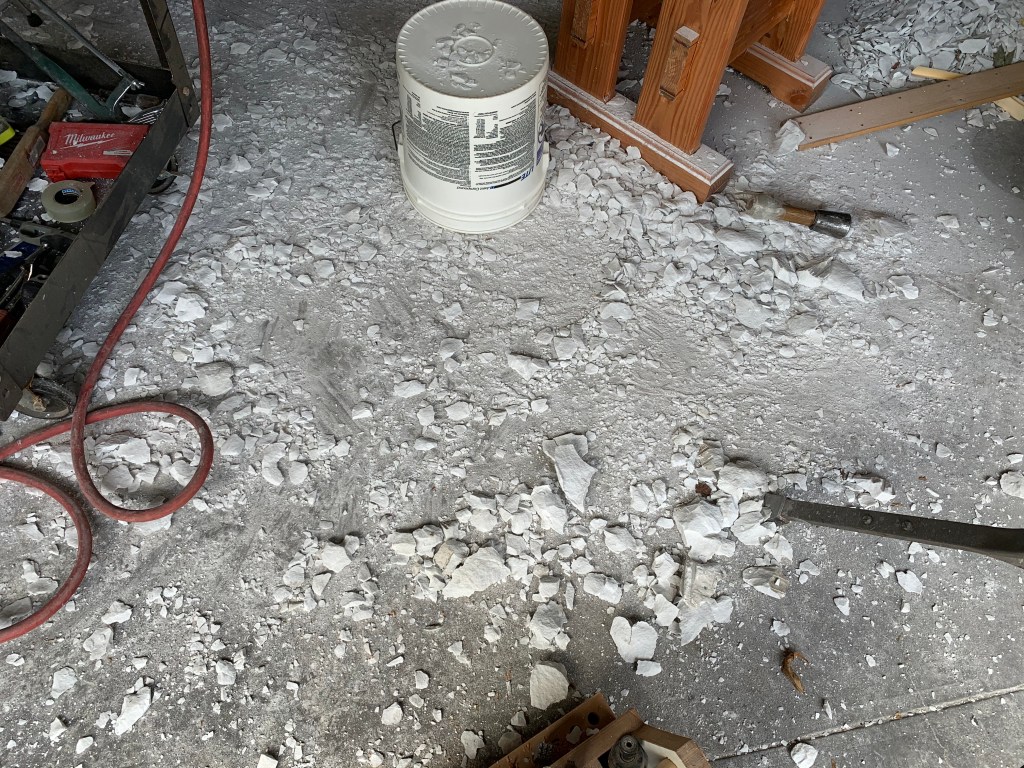
After a couple of hours. 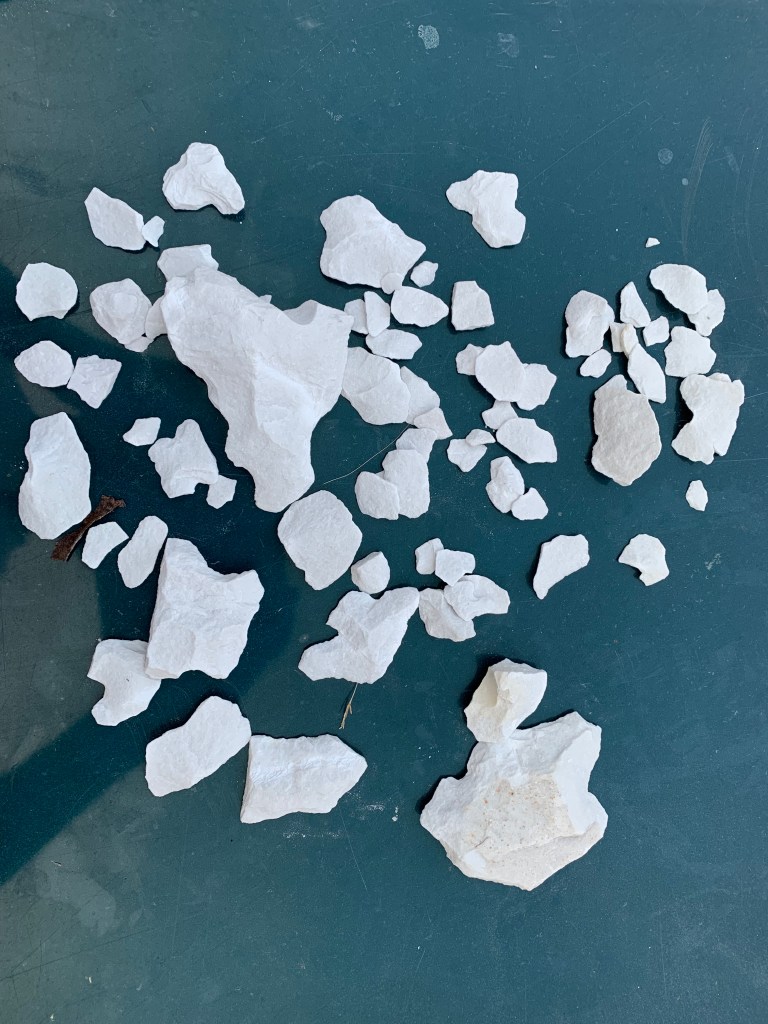
Typical chips.
Having a flat side facing out is critical. If the punch goes into the stone with an angle facing out, it will tend to break the overlying stone before sufficient pressure has developed to overcome the attachment of what should be the chip. The result is a narrow groove instead of a deep conical hole.
A round punch wouldn’t be nearly as efficient as a square one because the pressure would be concentrated in a line above the punch, which would tend to break the overlying stone prematurely. The problem is very much like what happens if an angle of a square punch is facing out.

As it was when I started, minus a few exploratory whacks. 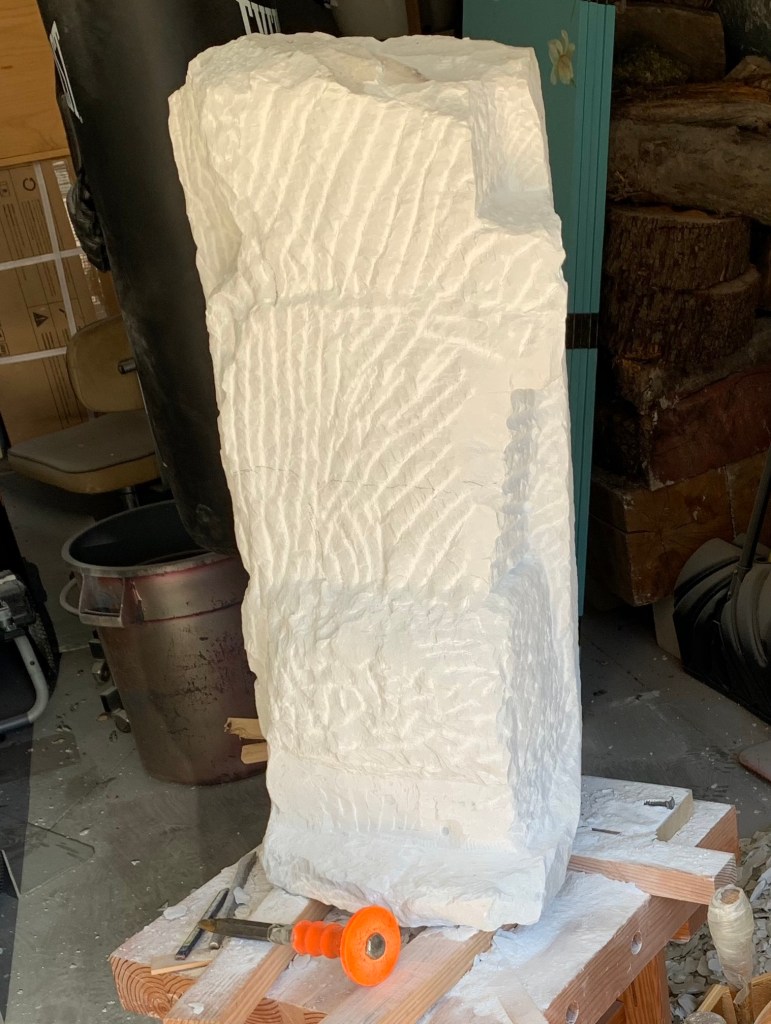
All suspect stone stripped away, plus the bare beginnings of the carving.
The Other Ways To Use A Punch
You can also do bulk stone removal by pointing a punch straight in. I’ve talked about this elsewhere. It’s less efficient in terms of the effort required and it doesn’t translate well to powered hammers. When you go in at 90 degrees, the stone is compressed outwardly all around the point. Marble can only support about 1800 pounds per square inch, so initially the tiny point pokes into the steel with minimal force. But the amount of steel pressing outward and the area of the stone facing it rises very rapidly with even a slight penetration, developing a bubble of compressed stone all around and below the tip.
The stone near the tip is compressed much more than the stone farther away. At some point the compression differential between the stone inside the bubble centered near the tip and the stone that is farther away becomes too great and the stone shears, detaching the bubble of highly compressed stone. Having nowhere else to go, the chips blow straight back towards the hammer. Note that this is a very different mechanism from the oblique punch which wedges the stone away from itself on the weak side.
In modern times this is primarily used for decorative effect, but it can also be useful in places where there is no room for an oblique stroke.
Punches also get used for odds and ends such as knocking off a knob of stone or prying away a substantial hunk near an edge. One thing I use mine for frequently is to punch a starter hole for a drill. This lets you center the drill on a very precise locations.
Next time we’ll talk about doing this with power tools.
