Enlarging the Model
In the last episode we made the half-size clay original and cast it in plaster. Now it’s time to enlarge it with the new enlarging machine.
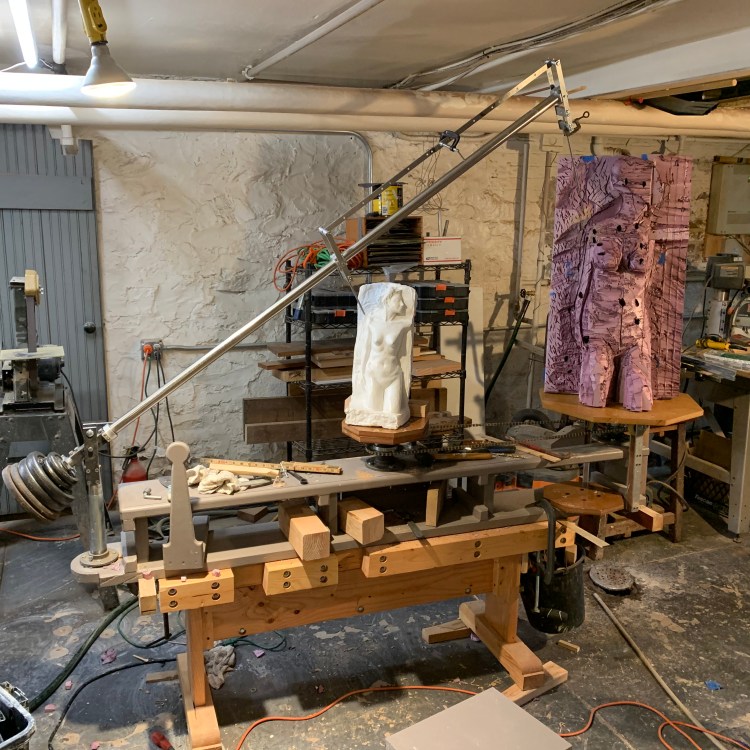
The machine. It’s a pantograph-on-a-stick. The tables are constrained to rotate in sync. 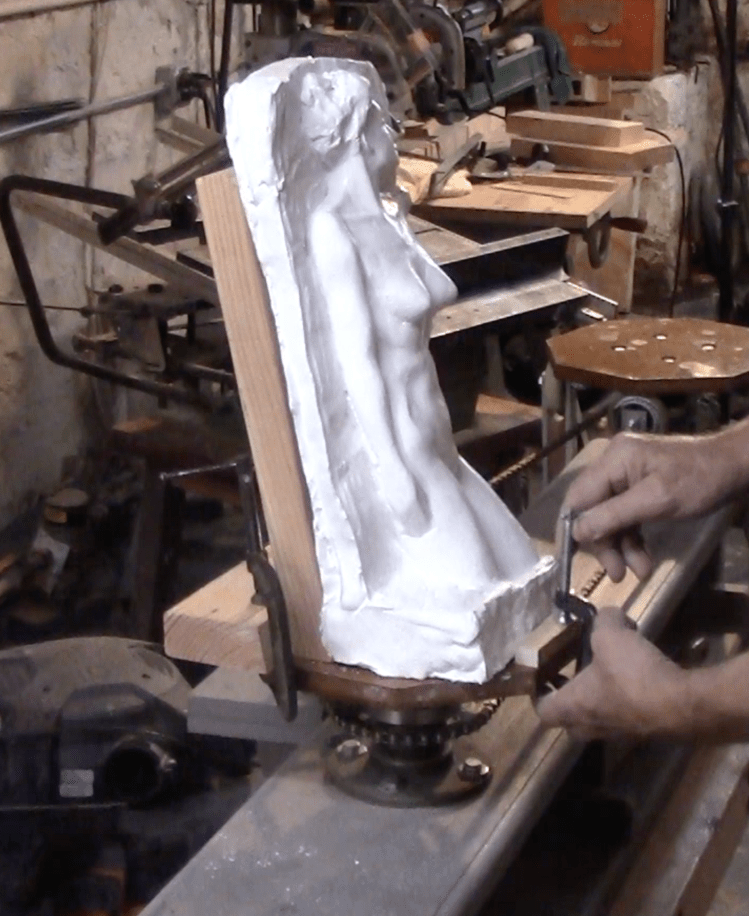
Mounting the model on the middle table. 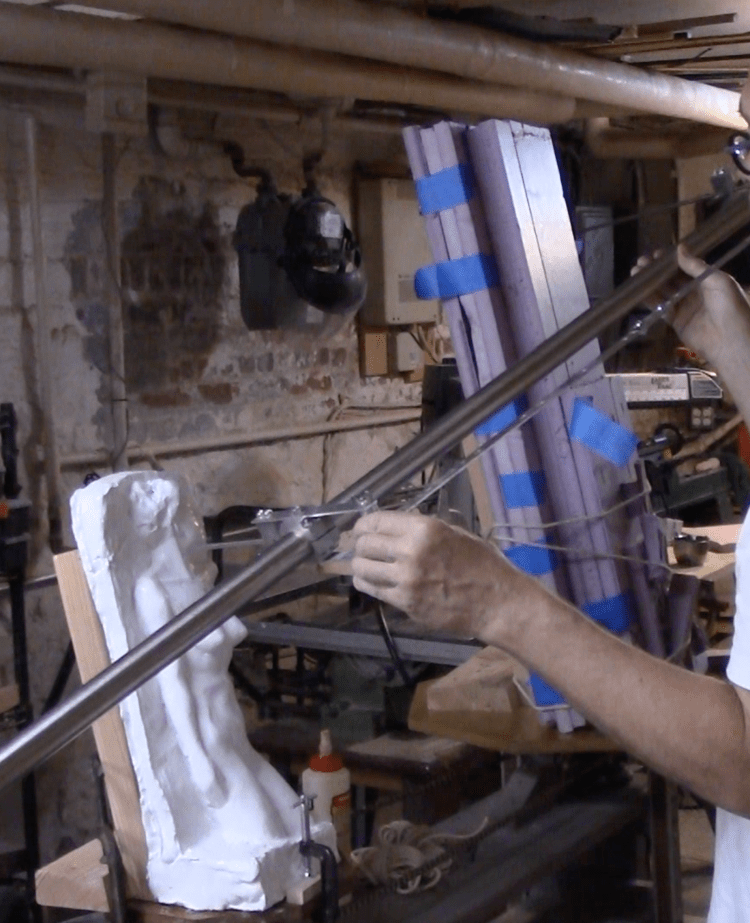
Tracing the model’s contours onto styrofoam. 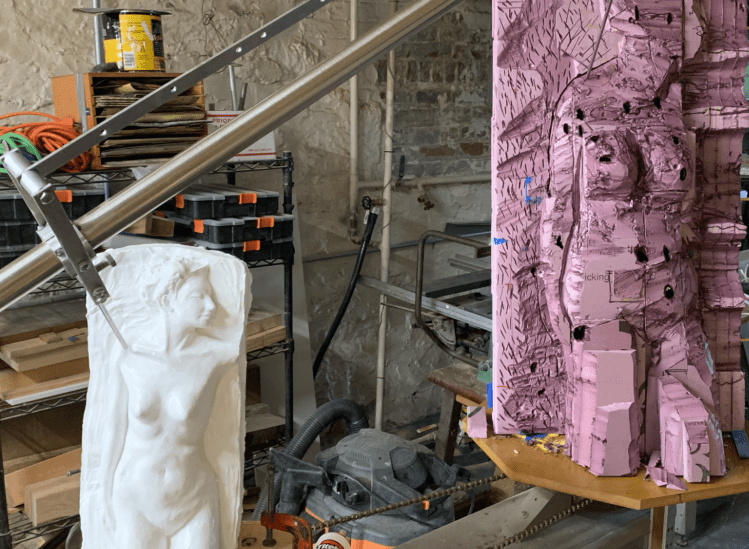
Alternately building up and cutting back the styrofoam. 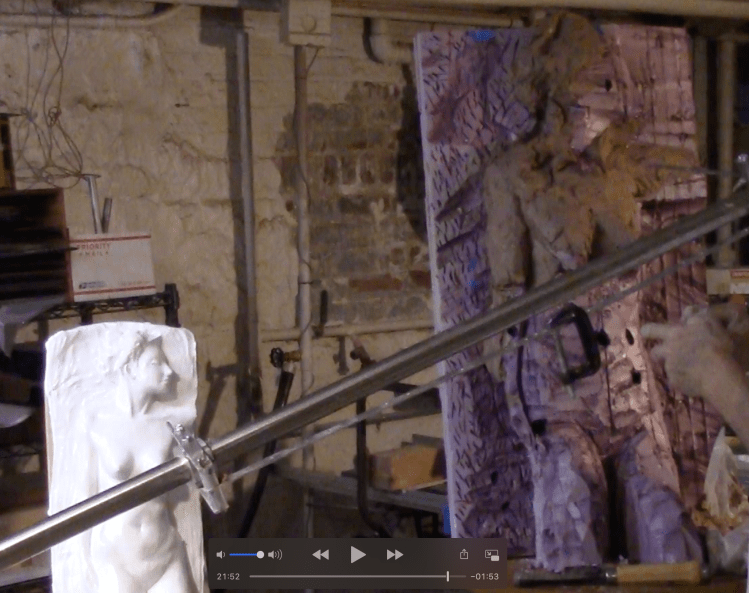
Covering the armature with clay. 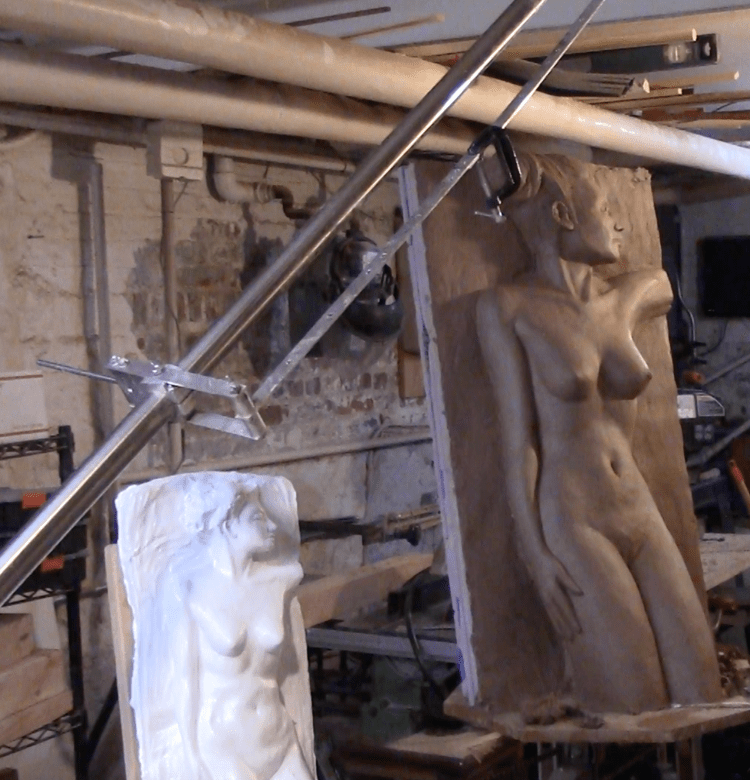
Pretty far along. 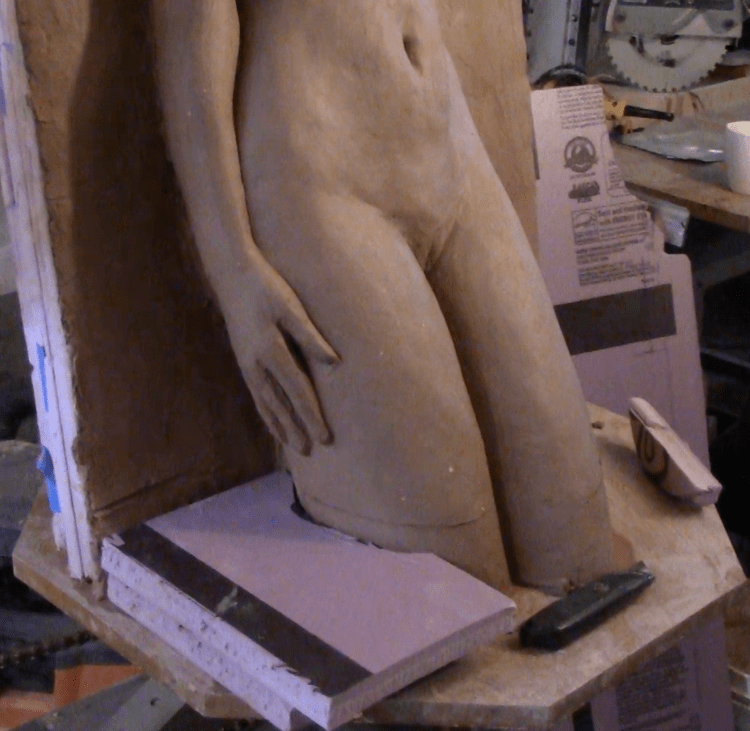
Building up the base. 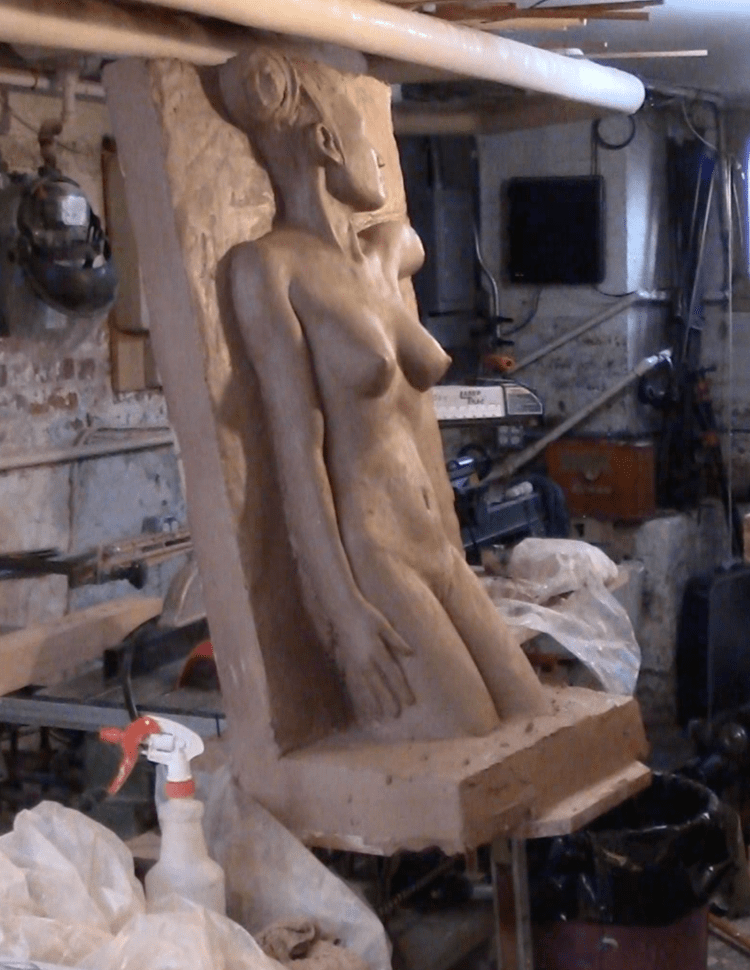
Almost ready to cast. 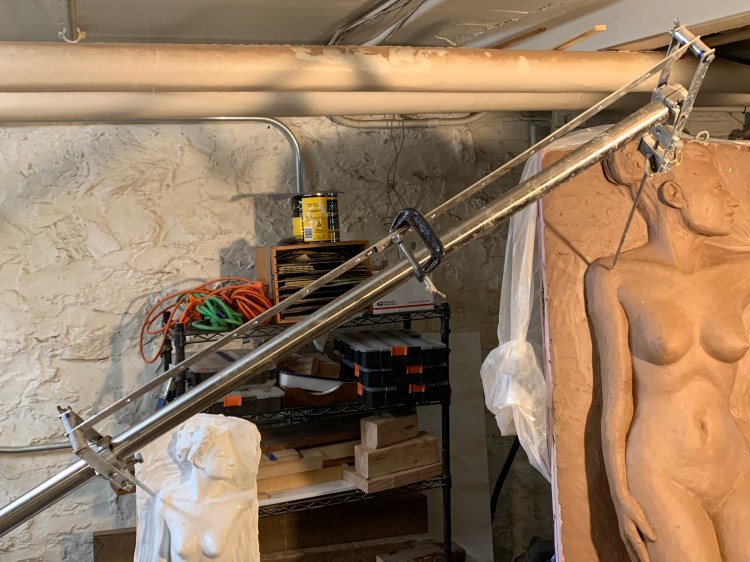
There’s a post about the enlarging machine here, so I’ll keep this short and just touch on what’s specific to this particular project.
Mounting the Model and Making The Armature
The half-size plaster model was mounted on the inner turntable with the center of mass roughly aligned with the axis of rotation. The model is just sitting on the table but it can’t move because the easel is clamped to the table and the block clamped in front pins it to the easel, keeping it from shifting. Balance matters because while the weight of the model is nothing, the target will get quite heavy.
I estimated by eye that it would take at least a five-gallon tub of clay for the full size piece and that turned out to be pretty close. Clay is about 1.7 times the density of water and a pint of water weighs one pound, so it works out to a little under seventy pounds of clay. At three feet tall and seventy pounds it would be like trying to move a giant wedding cake made of mud, so I decided in advance that I would make the mold in-place on the turn table. The plaster probably at least tripled the total weight, making it something north of 200 pounds. Now you can see why the frame and turn-tables are so hefty and why the target table has additional roller supports.
The first phase was to laminate a few layers of styrofoam to make the back panel and mount it on a wooden easel similar to the one used for the model. With the model clamped in place, I used the pointers to find the easel placement on the target table, noting the locations on the table top minus an extra inch for some more styrofoam to stiffen it further. The styrofoam was bonded with carpenter’s wood glue, which works but is very slow to dry. Next time I think a non-solvent-based construction adhesive or silicone might be better. The panel is glued to the easel and screwed with long construction screws through big fender washers to keep them from pulling through the styrofoam.
With the panel in place, I tacked styrofoam panels temporarily then used the enlarger to trace their shapes. Then I cut them out with a bread knife and glued them in place, using soft iron wire poked through the back panel to hold them while the glue dried. A few such layers of styrofoam were enough to support the figure. This is not a very exact process. The styrofoam must be fully contained inside a clay shell that is ideally about half an inch to one inch thick. If the styrofoam is too small it will require an excessive volume of clay to fill the gap, but oversize isn’t a problem because it’s easy to cut away the excess with the hot-wire tool or a big bread knife.
As I mention in the posting on the enlarging machine, during the armature-building process it became evident that the machine had a problem. The location of the target pointer varied depending on the angle of the boom. It turned out that the pantograph was out of parallel but it took a while to track down.
Applying The Clay
Applying the clay is easy but tedious. You put the pointer on the model, then build out a wad of clay on the armature until it just touches the target pointer. Then do it again an inch away, and again, and again…
When you have a cluster of a few wads you can fill in between them with clay by eye. When the whole piece is covered it will be a little rough, so you go over it with the pointers again making sure nothing is too high or too low.
Lessons Learned
One lesson is that the enlarging machine works very well, but the flaws all double in size too. Errors you don’t see when it’s 18 inches tall really jump out when it’s three feet tall. Therefore, once the whole thing was roughed out with the enlarger, I pushed the enlarger beam out of the way and went over the entire piece, correcting and making minor changes by eye. I spent more time on that than on the actual enlarging.
The second lesson is that designing in small scale and then enlarging is very much worth it because it’s so much less painful to make changes in miniature. The amount of work in a piece increases faster than linearly with scale. Something that you wouldn’t think twice about trying and discarding in miniature could waste days full size. This alone makes the machine worth while–it lowers the cost of experimenting.
The third lesson, which I now feel should have been obvious but wasn’t, is that taking great pains to get every detail into the model only makes sense if you’re going to pass the model on to someone else to do the enlarging. If you intend to do the enlarging yourself, it’s not only a waste of time, it is somewhat counter-productive because you are unnecessarily constraining yourself to details that you imagined in a different scale. For me, it would be most useful in getting everything in the right proportion and location so that could finish it full size without worrying about the big things.
Final Judgement
I’m very pleased with the machine but it’s not quite what I expected. My fear was that it would put all the creative work up front and reduce the rest to slavish mechanical copying. In fact, it’s almost the opposite experience. What it does for me is reduce the cost of changing ones mind on the overall design. Working this out in advance lets you apply the bulk of the clay very quickly, freeing you to do more interesting work. I’m looking forward to trying this again on a new piece.
Next time, we cast the full-size clay in plaster.
