One person working alone can split a stone of almost any size using little more than a drill, some steel wedges and a hammer.
Brooklyn is a great place. I met a guy on the street one day and we started talking and somehow it came up that we both carved stone. What are the chances? Turns out that he was looking to sell a couple of tons of marble he had sitting in someone’s yard in Sunset Park. Years back he’d bought truckload off-cuts from a tile factory in Italy, hired a container and ten tons or so shipped it to Brooklyn. He’d sold half to pay for the other half but now he was looking to unload some more to make the rent. It turned out to be beautiful stuff, pure white, and hard. Only in Brooklyn do you go out for beer and come back with a bargain truckload of fine Carrera marble. If you bought this stuff from a supply house it would cost at least $2.50/pound.
The splitting technique is simplicity itself. (1) Drill a row of holes in the stone (2) Drive a wedge into each hole and keep tapping until the stone splits on the line. What could possibly go wrong?
To tell the truth, there are a few caveats and gotchas but the tricky part is not the mechanics. The critical thing is understanding where you can and cannot put the split line. We’ll get into both after some basics.
Compression v Tensile
Splitting stone (along with many other stone-working operations) relies on the fact that stone is hard to crush but easy to pull apart. In engineering-speak it has high compressive strength but relatively low tensile strength.
The compressive strength of the stone is important because resisting crushing lets the wedges build up tremendous outward pressure. A crack starts when the expansive pressure at some point exceeds the tensile strength of the stone. Once you get a crack going, all it takes is light taps to propagate it across and through the stone. Cracks propagate easily because the stone around the crack can flex ever so slightly but the stone ahead of the crack cannot, which concentrates a great deal of spreading force at the microscopic leading edge of the crack. It’s a lot like ripping a piece of cloth–hard to start but easy to keep going.
Feathers and Wedges
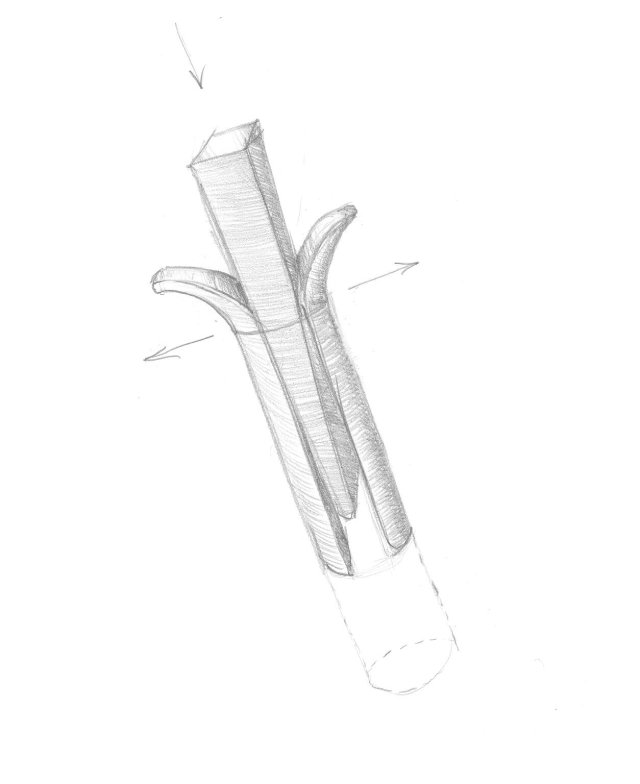
We’re going to use “feathers” with our wedges. The wedges are what produce the expansive force; the feathers are half-round metal pads that spread the pressure on the stone. The shape of a feather is somewhat subtle. The outside surface is a longitudinal slice of a cylinder of the diameter of the hole they’re intended for and the tops are curved so they won’t fall into the hole. The slice isn’t exactly parallel to the cylinder–it gets thicker at the bottom by 1/2 of the angle of the wedge. Two feathers together exactly make up for the taper of the wedge, equalizing the outward pressure as the wedge is driven in between them.
You can use wedges without feathers but it exposes you to two hazards. Most obviously, the wide end of the wedge tends to break up the stone at the mouth of the hole leaving a big crater and making it hard to develop enough force to make a clean break. (We’ll see a little of that below.)
The second problem is that the corners of the wedge bite into the stone on both sides of the intended split line. This provides opportunities for the crack to jump off at the wrong angle. I’ve seen people use wedges without feathers but mostly on hard stones like granite. I don’t recommend it unless you are much too experienced to be reading these notes.
Store-bought set of feathers and wedges they cost from $7 to $15 per set depending on size and you’ll want at least half a dozen. That’s small potatoes compared to the cost of the stone and they hold up pretty well if you don’t lose them. It’s tempting to try make them yourself, but in my experience, they are one of the tools it makes more sense to buy. Shaping the feathers correctly isn’t easy and the wedges need to be made of good steel because mild steel won’t take the beating. If you’ve had luck making your own, please put some notes in the comments.
The Wrong Image
The row of holes makes it seem like “tear along the dotted line” but don’t be fooled; the mechanics are almost the opposite. Closely spaced perforations weaken paper in part because they reduce the amount of paper but more importantly, they sever the long fibers that bind the paper together.
Stone isn’t like that. It would take many holes to weaken the stone significantly and there are no no fibers to sever. Counterintuitively, the only reason you drill holes when you split stone is because you need a place to put the wedges.
Surprisingly, deep holes actually make the stone locally stronger. The reason is that while it is hard to start a crack it is easy to keep a crack going. If you have a row of deep holes along the plane of the intended split, the crack will typically propagate from wherever it starts all the way to the near side of the next hole and then it will fail to continue on the far side of the hole.
This makes sense. If the local expansive force had been great enough to start a crack in the second hole, that’s where the crack would have started. To make things harder, the opening of the first crack further attenuates the expansive pressure making the probability of the crack jumping the hole even slimmer. (Trade secret: holes are often drilled in stone, wood, and other materials specifically for the purpose of stopping cracks.)
You can beat on the wedges some more to restart the crack but each time you start a new crack there is a fresh chance that the split will get sidetracked by some small local flaw and head off it the wrong direction.
On the other hand, if the holes extend only a little longer than the length of the wedges, the crack can usually spread under the hole and continue unimpeded both onward and upward.
Rift and Bedding
Bedding refers to the relationship of the stone to the earth it was formed in. This is not some quasi-spiritual thing—the layers of the original sediment are the main determinant of the directions in which it will break cleanly. The rift or grain direction is the direction in which the stone cleaves most easily. With sedimentary stones, the rift and the bedding are usually the same. (This is typically not true of igneous stones and it can go either way with metamorphic stones.) Geologists get fussy about the distinctions, but regular people often say bedding for rift when they are talking about limestone and marble, and reserve rift when they are talking about hard stones. I usually say bedding because I can never seem to remember “rift.”
With sedimentary stones such as limestone or sandstone it’s often easy to spot the rift orientation because you can see the sedimentary layers that determine the rift direction. Marble, however, is metamorphic; it is limestone that has been transformed by heat and pressure into a new kind of rock. It is the same chemicals in the same places but a different crystal structure.
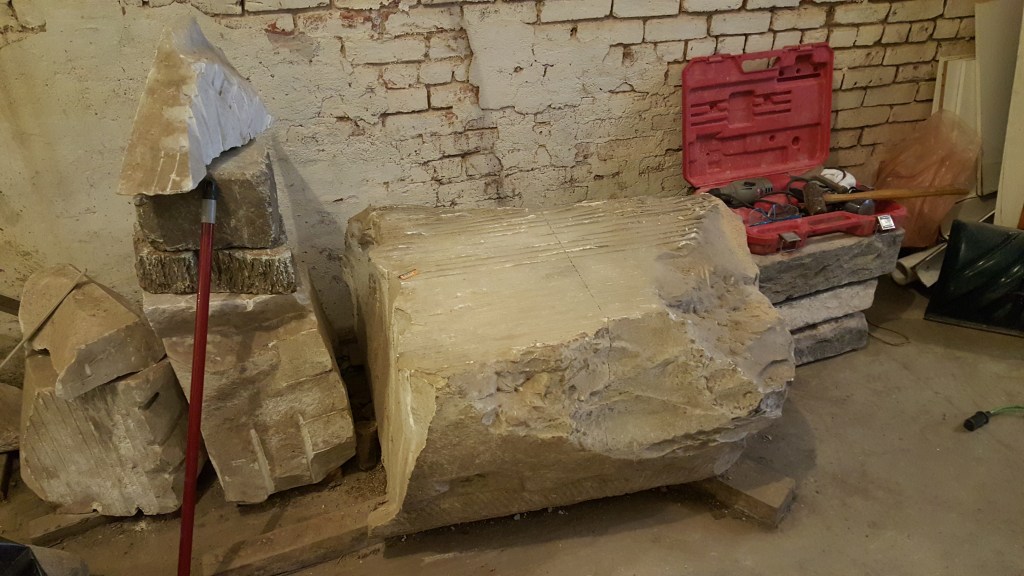
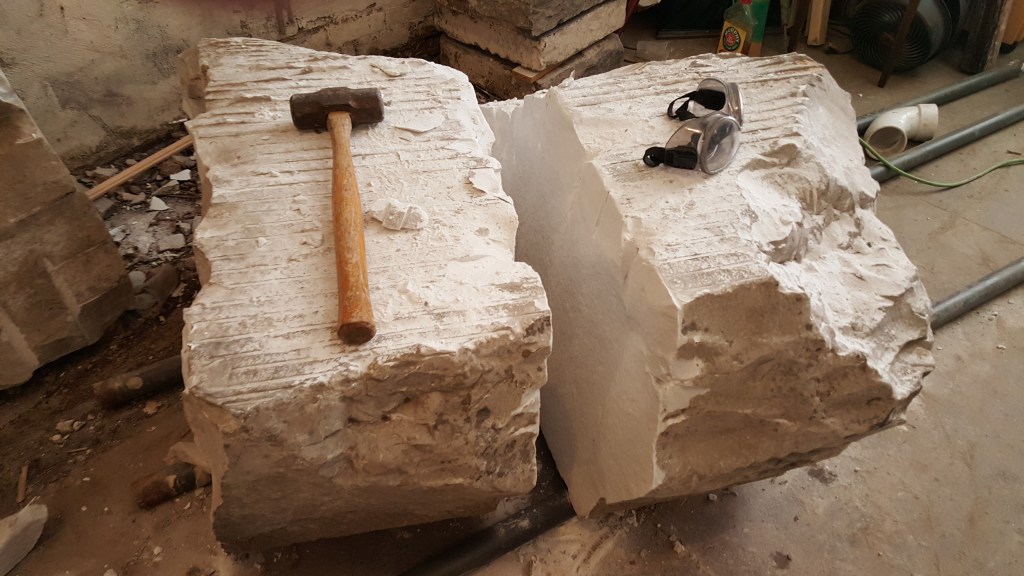
The rift orientation of the original limestone is preserved in the marble but the layering is usually not visible. Fortunately, you can often infer the rift orientation from existing breaks. The right hand end of the stone pictured below is a clean, flat break so any plane parallel to it should also work if it is far enough from the edge of the block.
The clean break doesn’t necessarily mean that it is the rift orientation, though. Planes perpendicular to the bedding direction will also usually split reasonably well. What usually won’t work is trying to split the stone an oblique angle to the rift planes. We’ll see how that can be a disaster later.
Bear in mind that not all stones have sedimentary origin. Granite, basalt, and diabase, for instance, are igneous, meaning they originated as molten rock. Such rocks usually also have a rift orientation but it’s origin isn’t as simple as sedimentary layering. This is because shrinkage from cooling, rather than layering, is usually the big factor in determining the rift. Igneous stones also often have both a major and a minor direction. This is getting into real geology, so let’s leave it there.
Starting Simple
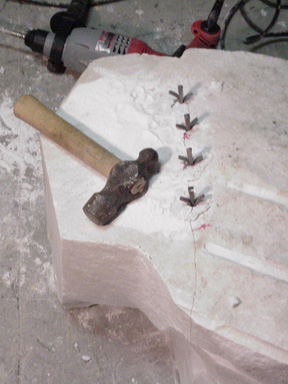

This was an irregular off-cut that I want to make a flat side on. It’s been worked on before–you can see some old drill holes on the right that are a great example of drilling too deeply.

You can see that it has been cleanly split on the left hand side, so any break parallel to that plane should be ok. The next step is to drill a row of holes. We avoid splits too near the edge lest only part of the desired piece cleave away. The near edge is irregular so we ignore the little triangle for purposes of placing the holes. We could have gone a little closer to the edges and put in a fifth hole, but I was confident about how this stone behaves. Note that the holes were just deep enough for the wedges plus a smidgen.
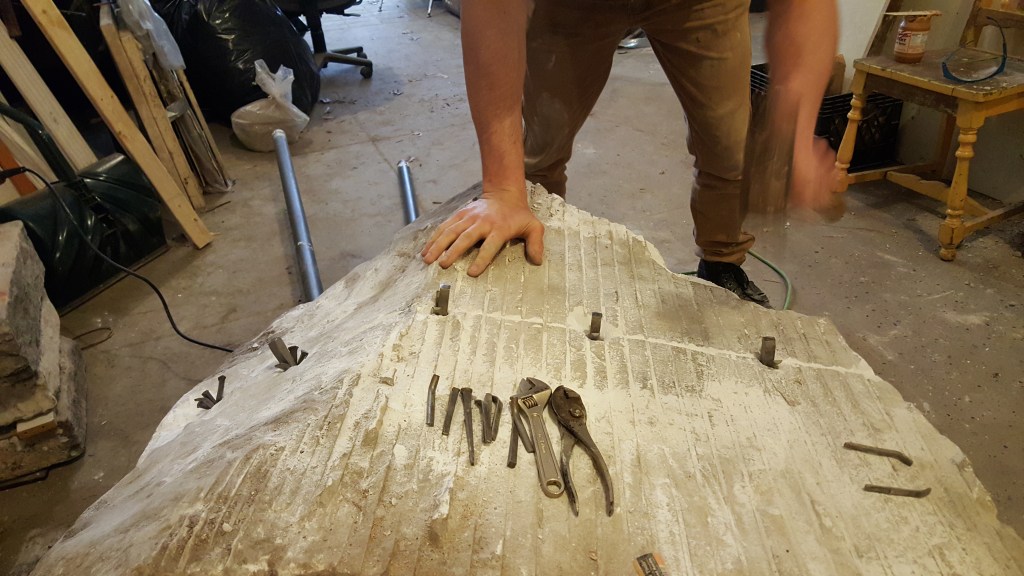
With all the wedges in place, snug them up with a few taps, then go round robin pounding them in together in stages. The sound goes from a thunk to a ping to higher and higher pitched pings as they get tighter. Strive to keep the pings close in pitch to ensure even pressure.
Take your time. When the pings get high pitched, take a break for half an hour. It should break pretty soon after you start tapping again. You may hear when the crack starts before you see it. The sound will suddenly go dead for the wedge where the crack is starting. Keep the crack going with gentle taps and you’ll quickly see it run full width as in the middle picture.
The picture on the left is from the opposite side. It’s a perfect break exactly parallel to the bedding plane we identified.
Several Ways To Mess Up A Break
Below is an example a stone with a successful break on the right, and a disastrous break on the left. (Note that the stone is pictured upside down relative to it’s orientation when the cut was attempted.) There are a lot of things wrong all over this stone, so lets go through them.
Trying to split at an angle to the bedding plane is the most obvious problem. It looks like the driller thought that the rift was horizontal with respect to the way the block sits in the picture. Actually, the brightly lit face near the top at bout 40 degrees to the floor is at the rift angle.
How do I know? The first clue is that it’s a nice flat break; just look at that crisp front edge. You can’t tell from the picture, but the surface is also relatively smooth. A supporting clue is that it is perpendicular to the big break on the right side. The big break is reasonably clean, but not as smooth and flat as you’d expect if it were a rift plane. It’s overall planar, but it has a lumpy, rough surface that suggests that it broke neatly because it was perpendicular to the original bedding of the rock.
Now look at the disastrous break, low on the far left at the rear of the block. The break produced a small, perfectly flat, smooth, plane that is exactly parallel to our candidate face. The back-most hole drilled for the split runs through it.
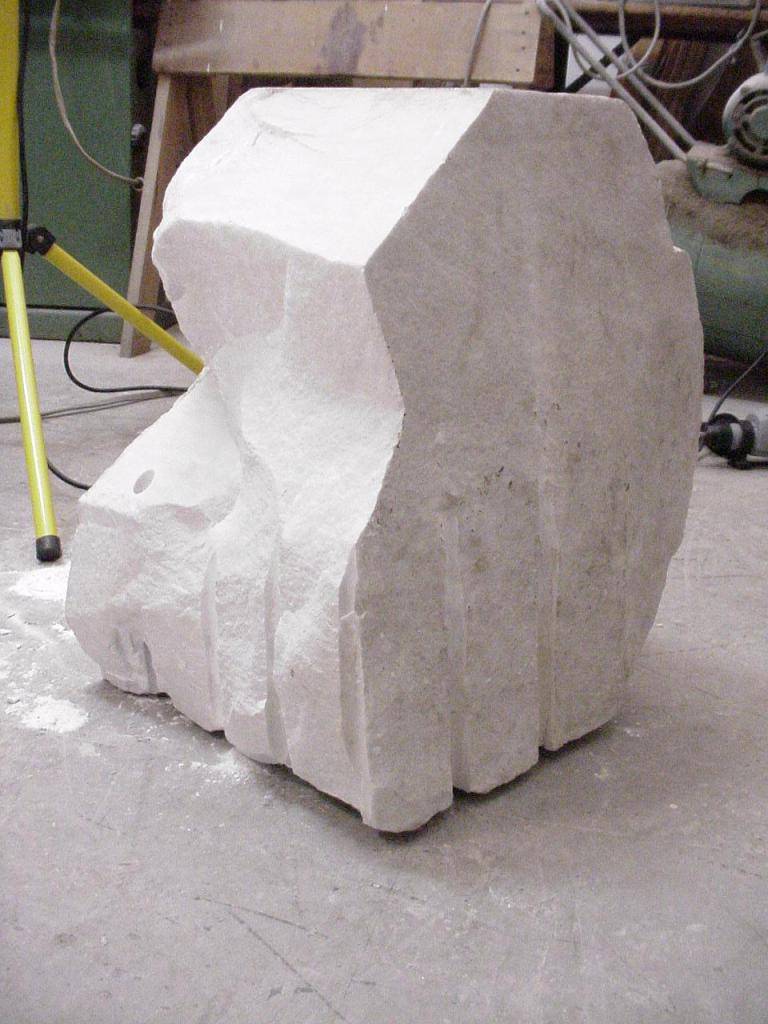
That two smooth, flat planes are perfectly parallel pretty much clinches it. They are both at the rift angle. The easiest breaks will be parallel to these rift faces. Breaks perpendicular to those faces will usually work too. Other angles are an invitation to disaster.
You can see that the failed break started out near the intended break line, but already wasn’t very straight when it jumps about 45 degrees into the stone and then angles back out. Notice that toward the back of the block the break jumped to a rift plane and made that smooth spot but then flipped 90 degrees when it resumed the uneven break. A mess like this to be expected when the intended split is at an angle of other than either 0 or 90 degrees to the bedding orientation.
There are some lesser bad decisions in evidence as well. The holes are very large. There is no need for one-inch holes. The large diameter does no harm, if you have wedges that big, but half inch or 5/8 wedges would have been fine. More importantly, the holes for the wedges are about a foot long. This particular break would have been a mess regardless, but you can see that the breaks weren’t jumping straight across the line of holes and that’s probably part of the reason. It looks like the break started on the hole nearest the camera and wanders off more with each hole. It almost completely missed the last hole that goes though the flat spot.
Checking for Flaws
There is something even more egregious going on. Look closely at this detail shot of the far corner of the bad break. This is the plane that was penetrated by the drill hole seen from the back side of the stone.
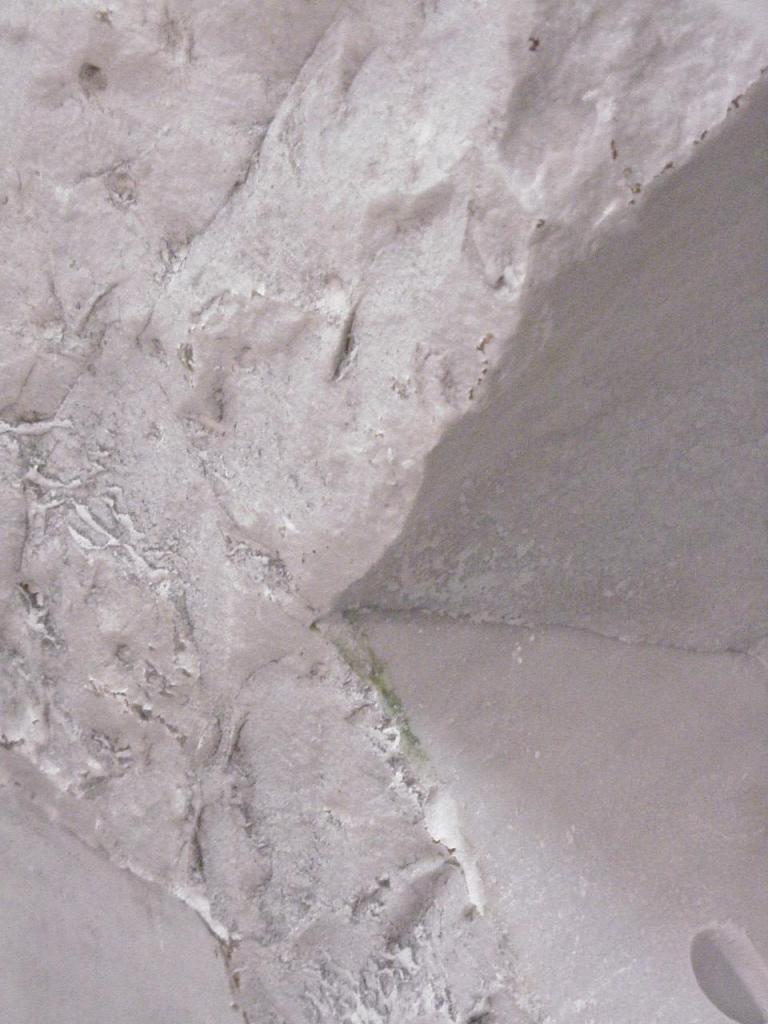
Here you can see exactly why the bad break jumped so cleanly to that very flat plane. See the fringe of green algae along the right angle into the stone? That’s where water was getting into a crack in the stone when it was stored outside and sunlight allowed algae to grow. The stone was already separating on this plane. You can see that the crack extends into the unbroken stone on the right for a couple of inches then makes a right angle and heads off toward the top of the photo. It also extended along the plane all the way to the bottom of the picture and beyond. You can see faint green algae the whole way. This would have been plainly visible before the split was attempted.
Post break, you can also see that the crack runs into the stone where the clean new face intersects the main body of stone. It’s just as well this stone broke badly because that crack, if not discovered, would probably have ruined a carving later.
Flaws like this are not hard to find. These should have been visible at a glance but on a clean stone they might be hard to spot. One way to find them is to spray water on the stone. A crack will suck up water, so you’ll see a line of dry stone highlighting the crack on an otherwise slick surface.
Another way to detect the presence of cracks is to tap the stone with a hammer. Just as a china dish will sound broken even if you can’t spot the crack, you often get a dead sound in stone if you tap with a hammer. You should always tap on a stone and listen carefully before investing money or work in it.
Splitting a Bigger Stone
OK, let’s do this right on a larger piece of stone. I’d love to have kept this as one big block, but the bad condition of the stone on the right side makes it too risky for carving. I’ll be able to get smaller pieces out of that heel, but it’s almost certain to have deep flaws.
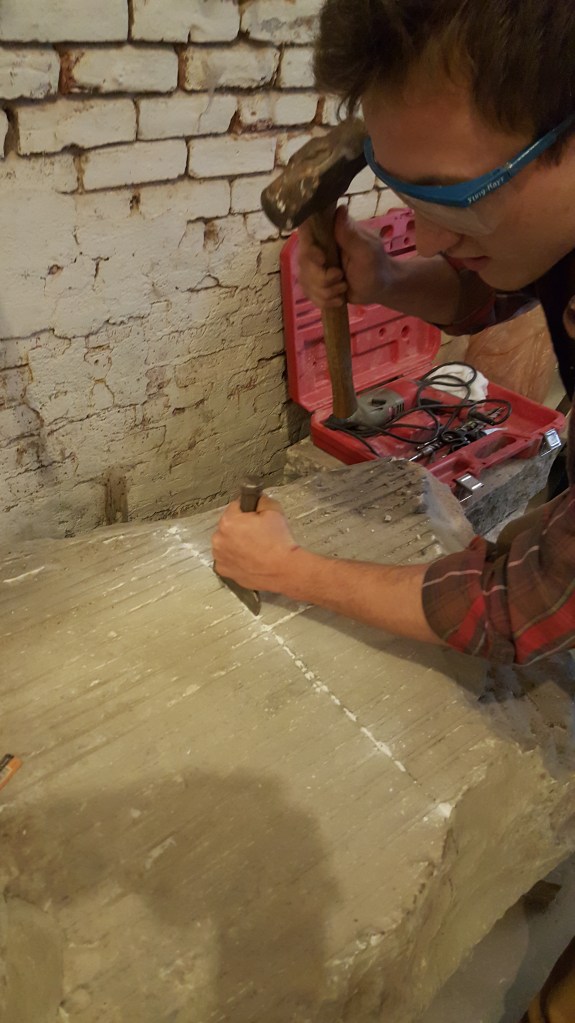
- Mark the break line. There was already a clean break on the end, so any parallel plane should be OK. This block is irregular and weathered so we decided to mark the line on three sides.
- Using a brick chisel, Arliss (#3 son) scores the stone along the line until there is a sharp score mark defining the intended break. For hard stones you might want do do this with a carbide tipped stone mason’s tracing tool. For moderately hard stones like marble any wide steel chisel will do fine. The tiny cracks that this starts will help guide the split. This isn’t always necessary but it’s a little extra insurance when cutting a valuable stone.


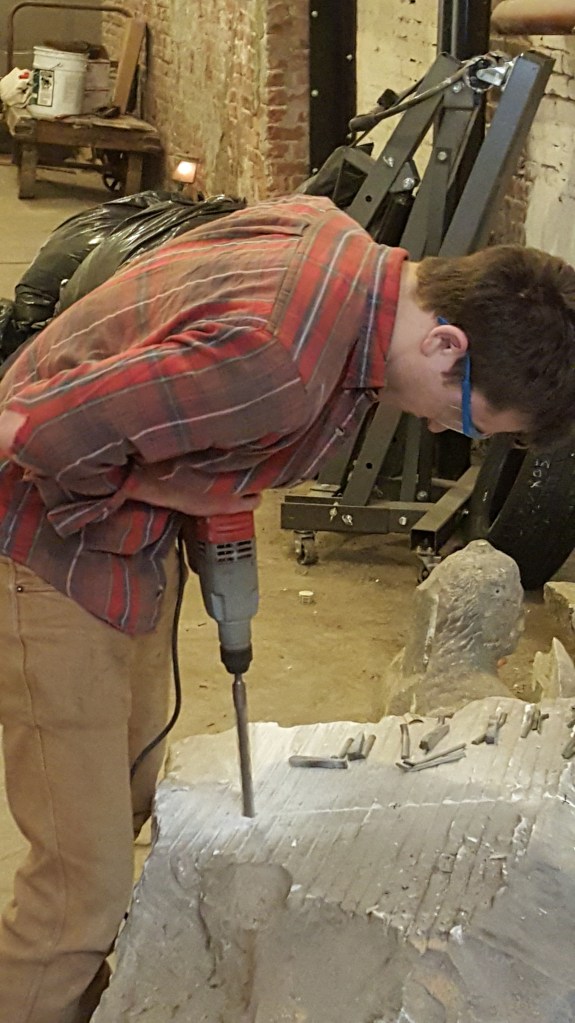

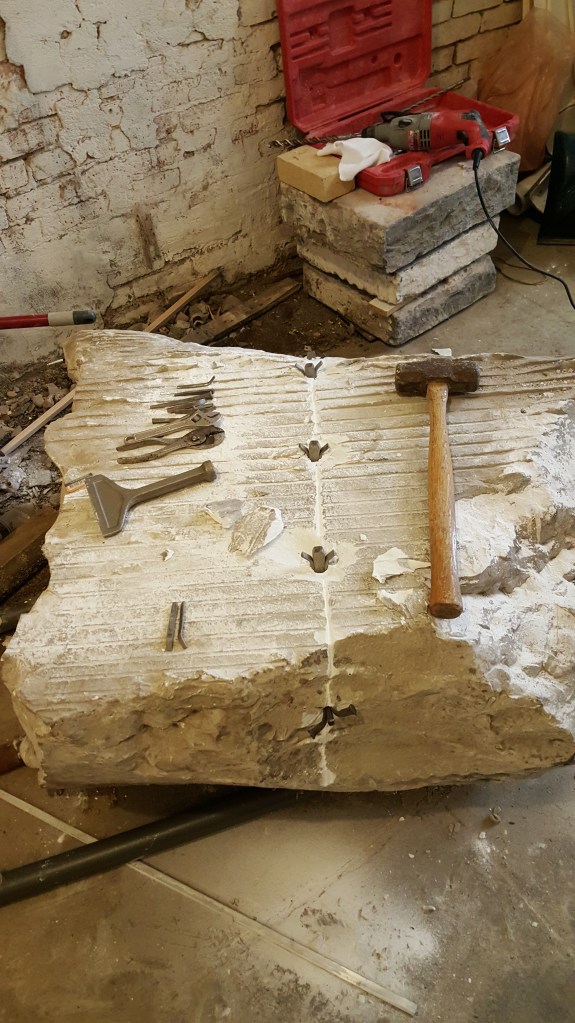
- Five-eights inch holes for the wedges are drilled with the rotary hammer drill using carbide bit with an “S” type shank. This a very standard tool you can get at the big box store. Don’t bother with a non-hammering drill. They take forever.
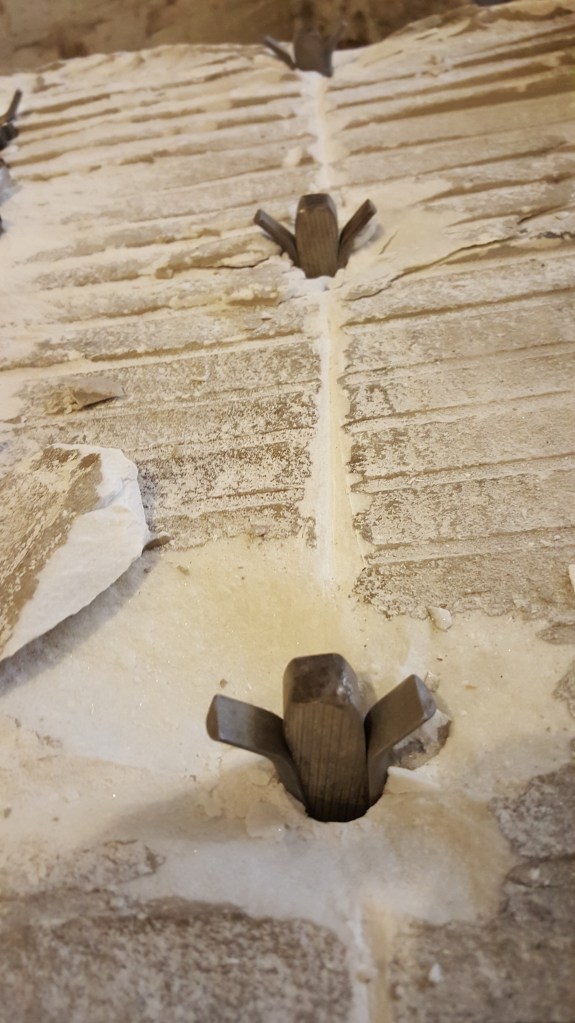
- The feathers and wedges are placed and tapped firmly with the engineer’s hammer. They should be oriented perpendicularly to the intended break. If you look at wedges on the far left you’ll see that we ran out of feathers and used some some 20d cut-nails in their place. It’s not neurosurgery.
- These holes are a bit widely placed. A few more would be good but that’s all we had.
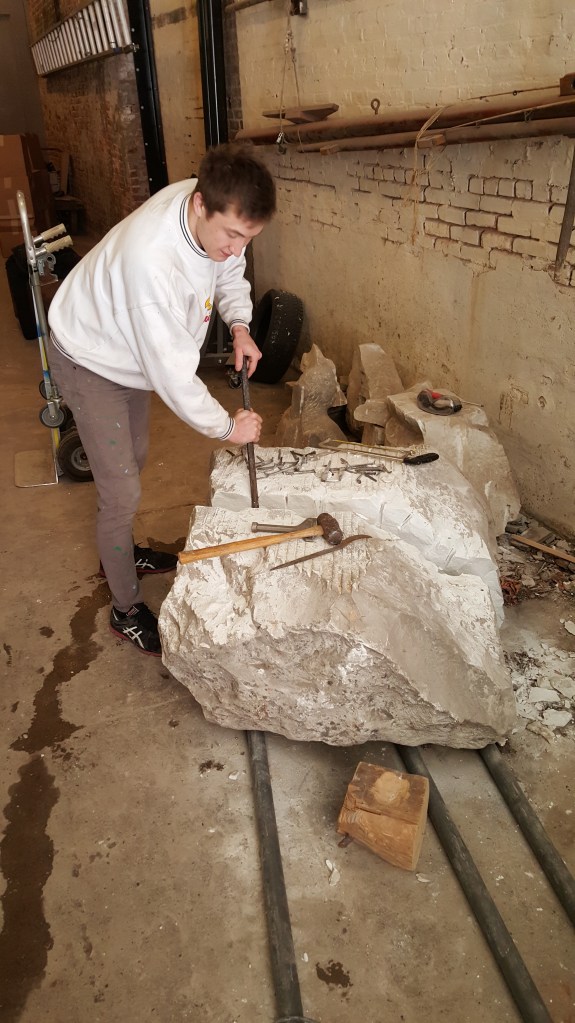
- Arliss keeps tapping round-robin until the wedges sing when struck. You can see from the damage to the top edge of the holes that they’re under quite a bit of pressure.
- Then we leave it be for a while. Half an hour later just a few more whacks split it. At no point was it necessary to lift the hammer more than a foot. We got an extremely clean break than never deviated from the scored lines.
- By plan, the block was already sitting on pipes, so despite the pieces weighing close to 1000 pounds, they are easily shoved around with a crowbar.
Notice how much cleaner and more precise this break was than the old one on the end which wanders at the back and near the bottom and undulates around the drill holes. Tracing the break first is part of the reason.
Hazards of the Trade
- It’s best to have split lines in the middle of the block. Splitting a thin piece from a fat piece often ends with an uneven break.
- Look ahead to what is going to happen after you split the stone. You might want to have lumber, pipes and/or lifting chains in place in advance., as it can be difficult to get them under the stone later. We had the stone on long pipes to make it easy to move the pieces.
- Always be paranoid when shifting around heavy objects like stone and steel. They can hurt you in multiple ways. Obviously a stone can fall on your feet but it’s really common to get a finger or hand clipped between two heavy stones, or to get a hand between a block and the wall. Another sneaky non-obvious hazard is having your hand wrapped around a crowbar, pipe, or block near the floor, for instance, when putting wood dunnage under something. When a stone comes down on the bar or block it can trap and crush your fingers even though you seem to be far from the hazard. One concrete thing you can do is tie rope or chain around the stone before you split it to control the motion of the split pieces.
