Tired of making do with a woodworker’s workbench, I’ve spent a good part of my mandated Covid-19 holiday reworking an ancient design for a carpenter’s bench as a sculpture workbench. It’s a prototype, but I love the result so far. I’ve learned so much I’m thinking of making something similar specifically for stone.
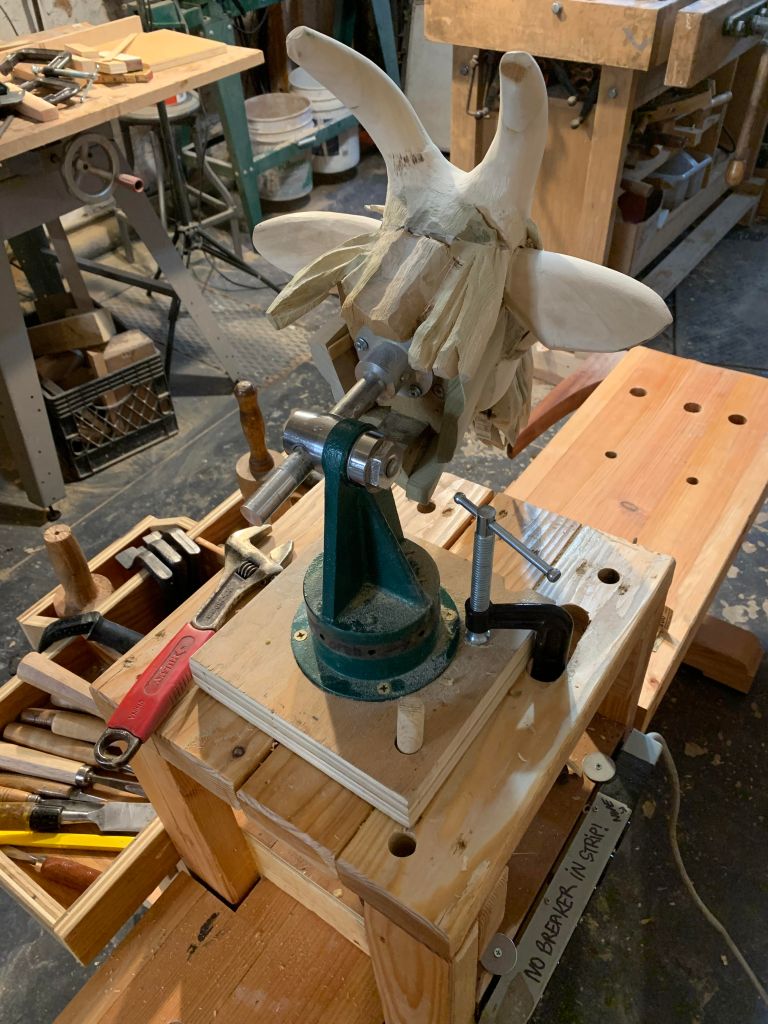
It’s been a couple of months since I wrote this post, but in that time I’ve had a chance to really shake this thing out. Sometimes you make something you think is great, and then it never gets used because somehow, it doesn’t quite hit the sweet spot. It’s not enough this for one thing and not enough that for another. Not this time–I’m using it all the time. Right now I’m frustrated because it turned out to be the perfect mount for the enlarging machine and I can’t use it for anything else until the enlarging is done.
But You Already Had A Great Bench!
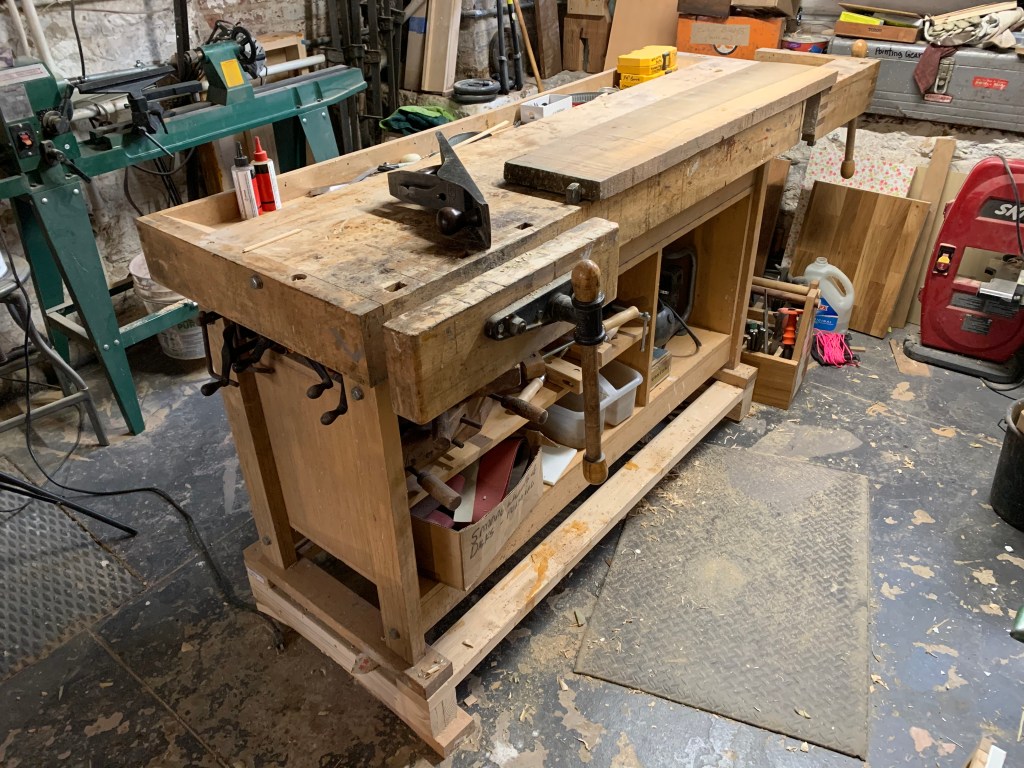
Yeah, sort of. The bench in the picture is sort of OK for straight woodworking. But I’ve been using and abusing this generic store-bought woodworker’s bench for decades for woodworking, stone, clay and plaster, plastics, metal, working on machines, whatever. Geppetto would love that bench with the old-fashioned narrow work surface, tool-well in the back, face-vice on the front, and a tail vice for vertical work and clamping long boards on the top with bench dogs.
But I don’t make talking puppets. I’d never build or buy one like it today even for woodworking and it’s completely unsuited to making sculpture.
Things That Make It Wrong For Sculpture
I’m going to leave out all the subtle weaknesses of this bench for woodworking and just name a few things that make it wrong for sculpture.
- It’s tall and narrow with the working position on the wide side. Exactly wrong when you are shoving heavy stones around.
- A woodworkers bench is geared toward working on planks first, and panels second. It’s not at all designed for working on big tall heavy things.
- The tool well
- Sacrifices a third of the work surface.
- Makes it hard to use the bench from two sides.
- Is supported on the back by a 3/4″ plank that can’t stand up to serious weight.
- For such a big expensive piece of furniture it’s somewhat limited for work-holding.
- The front is the only place where you can have dog-holes and hold-fast holes because it is only solid for a couple of inches in the front. The rest is an inch thick.
- The cabinet makes it awkward to clamp fixtures to the top.
- The thin top is light. With a work bench it’s all about the bass, no treble.
An Ancient Design
Ironically, the idea to design a low bench came from a YouTube channel for raw novice hobby woodworkers, none of which I am. Starting out with minimal tools and zero power tools is its theme. The channel is called Rex Figures It Out . But hey, I’m not too proud for a beginner lesson; it’s a great format. Rex calls his “the thirty dollar work bench.”
Rex based his thirty-dollar design on the classic “low Roman workbench” (see picture below) that has been around for thousands of years. It is described in the book “Ingenious Mechanicks” by Chris Schwarz, which is a compendium of old school techniques for work-holding.
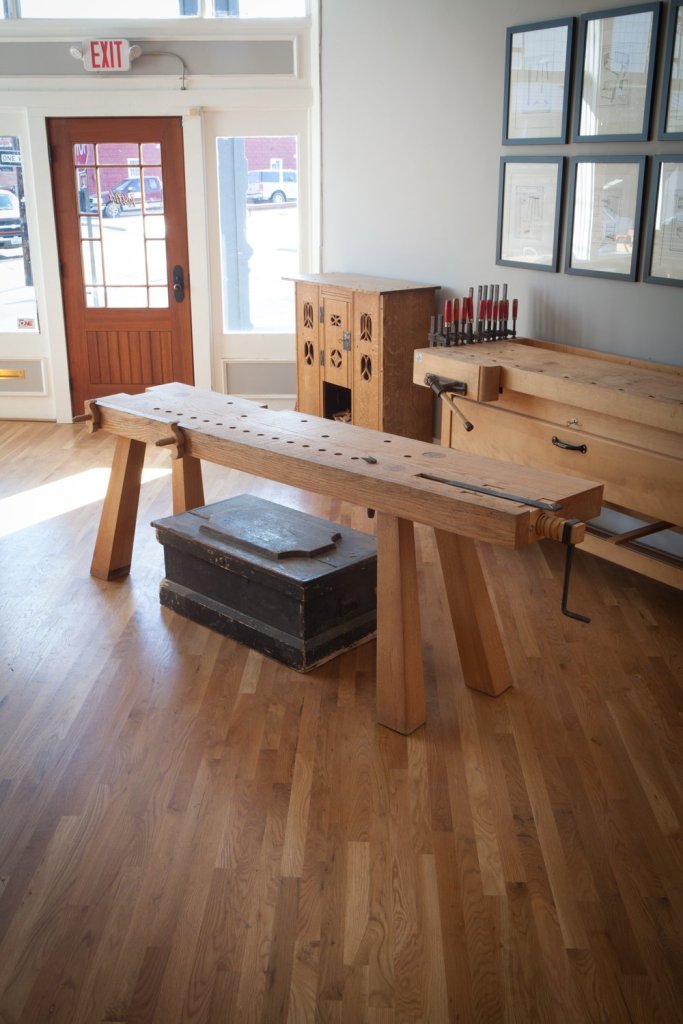
Few woodworkers use this style of bench anymore, and for good reasons. The knee-high design is optimized for using hand-powered tools such as saws, planes, and augurs. These are tools you want to be able to put your weight above. It is also designed to straddled and used sitting down.
Nothing about the design suits a modern woodworking shop. Hand saws, planes, and the brace and bit have been relatively little used since shops were electrified and woodworkers rarely work sitting anymore. Sitting or kneeling on the work-surface makes a lot of sense when using draw knives, spoke shaves, and similar tools. A worker pushing off against the bench that is holding the work instead of from the floor reduces the tendency of the bench to rack or to rock which means that the bench can be relatively small and light. Modern woodworking benches are typically built large and heavy to stand up to even the relatively modest forces that modern woodworkers with power tools apply. You even see people putting sandbags or barbell weights in the cabinets.
A classic low Roman bench would only work in a modern furniture or cabinet shop as an auxiliary bench and even then only if you had acres of space, but it’s a great design for an sculptor.
The Roman Bench Updated
The low Roman bench is outmoded for woodworking but it’s got potential for sculptors. Every sculptor is part carpenter. Regardless of your medium, there is always something that has to be supported, contained, displayed, or packed for shipping using wood. If you carve wood, you spend a lot of time cutting and planing wood for gluing up. If you carve stone you have to build supports and bases and such. And studio space is precious; you want anything you devote floor space to to be able to switch hit and look good doing it.
The bare naked bench. 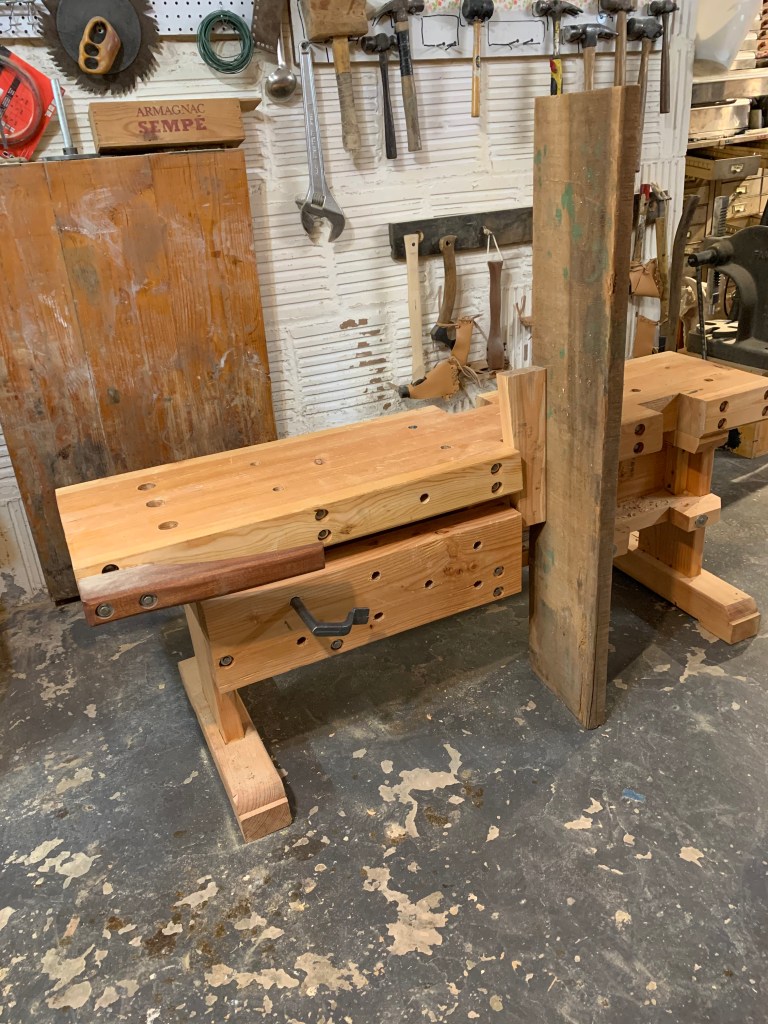
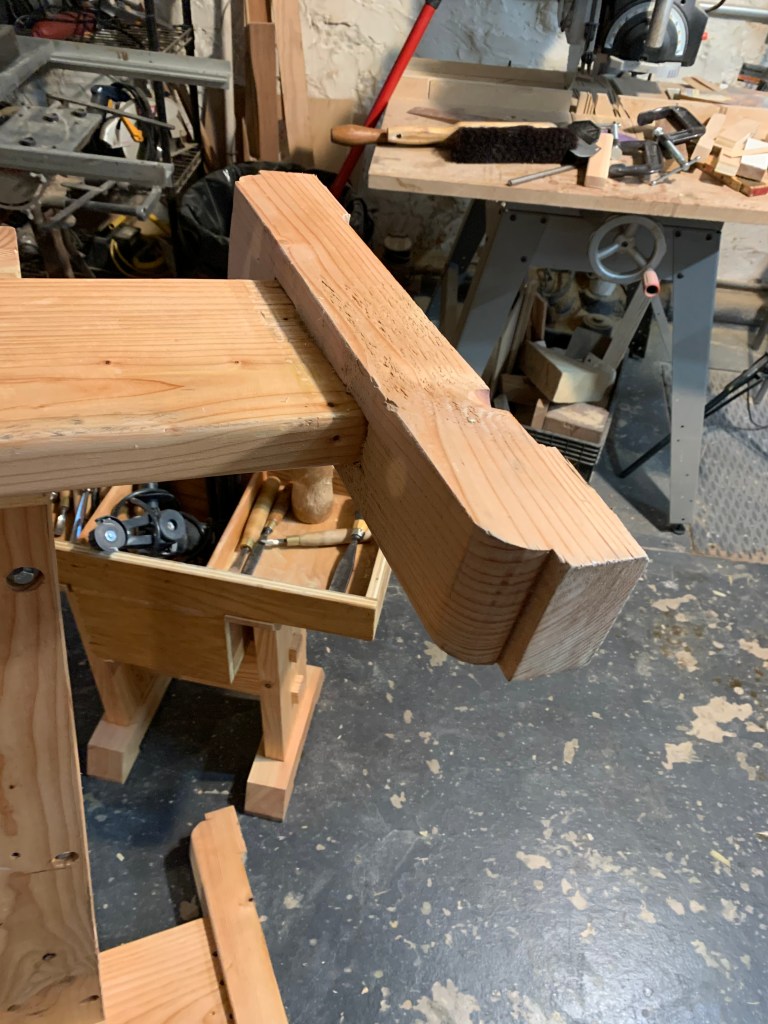
Clamping wood upright with a wedge. 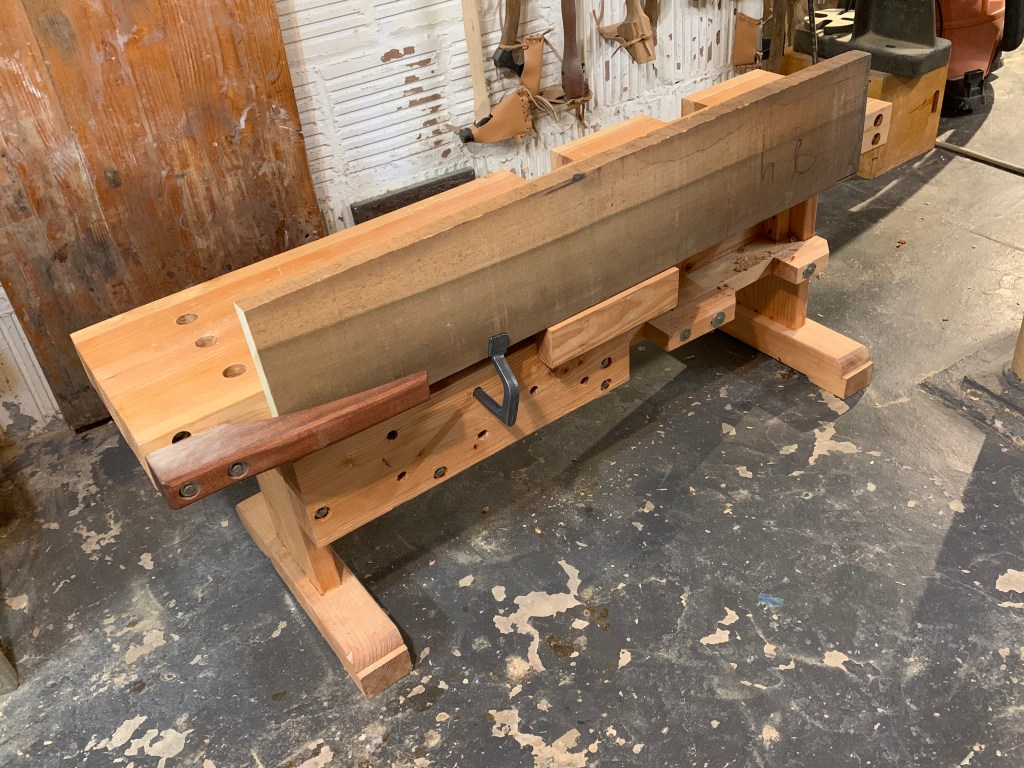
The crochet for working edge-up. The hold-fast is optional. The support block pops in and out as needed. 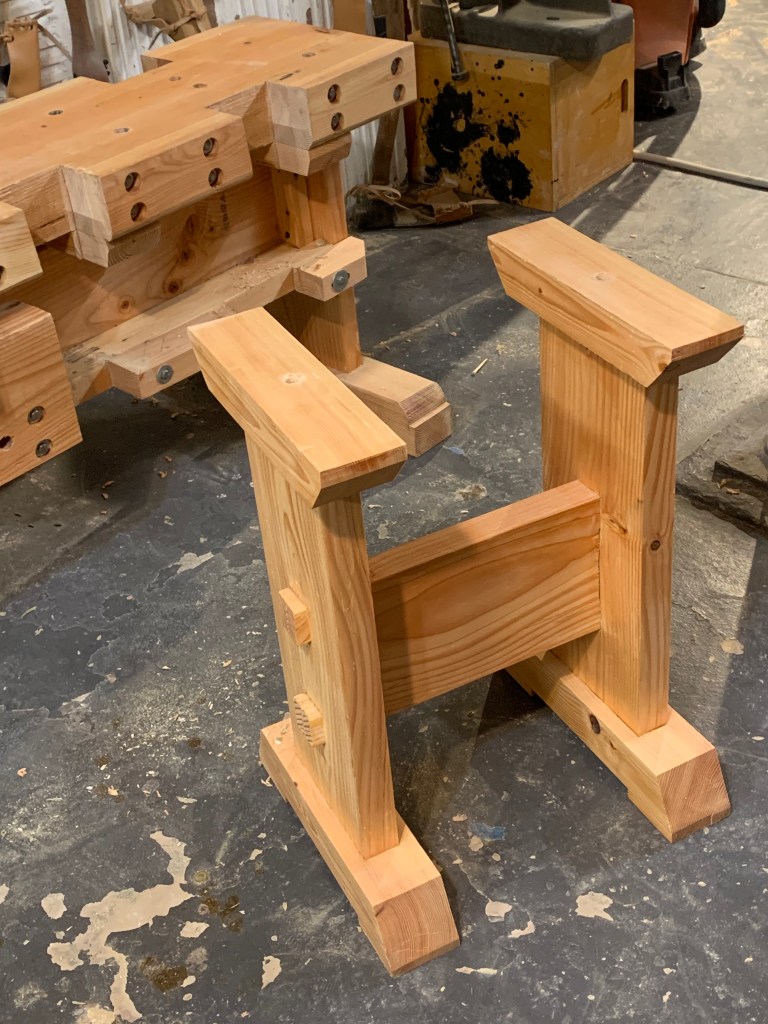
The bare saw horse for sawing. 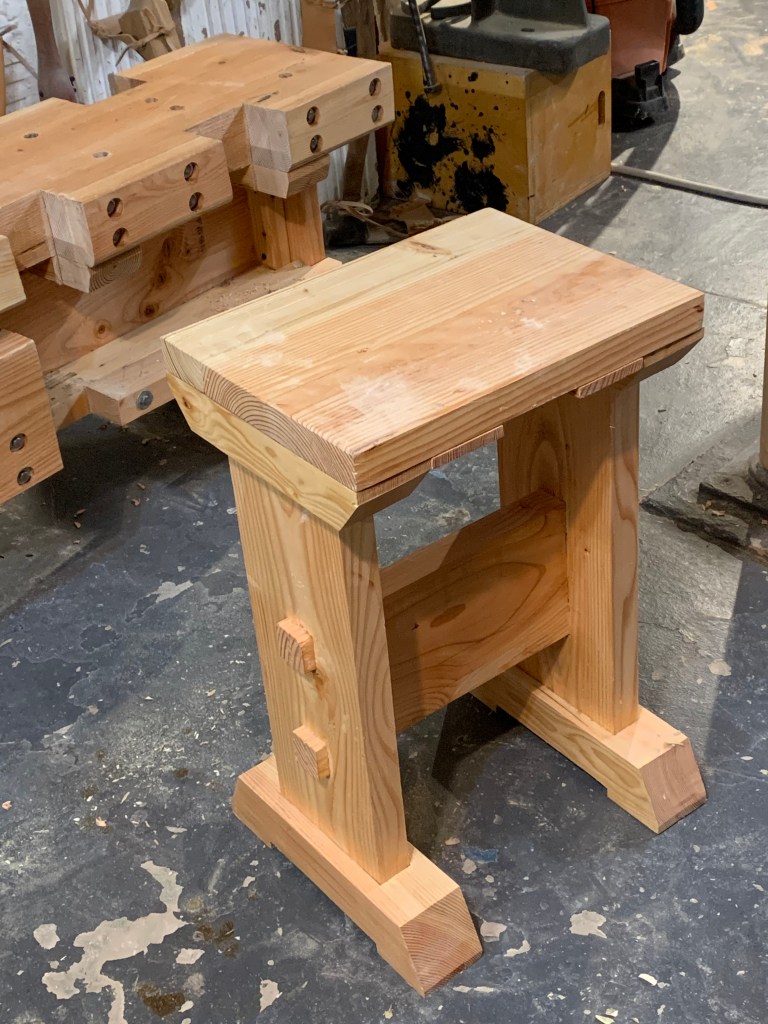
With a snap-in bench top. 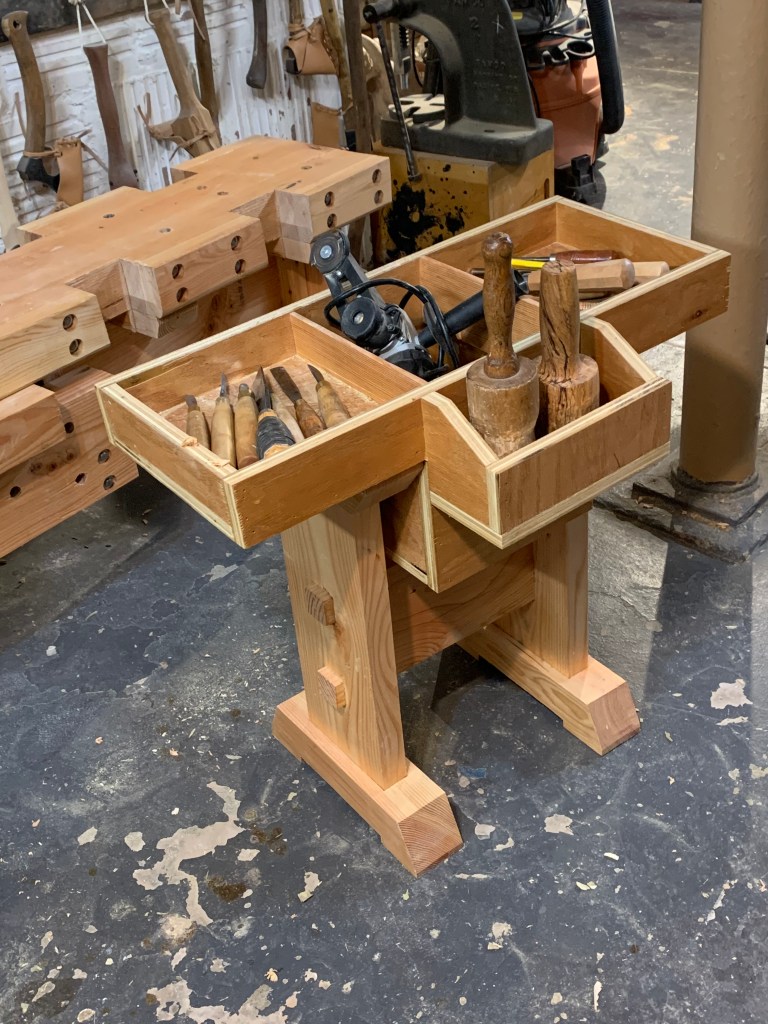
A tool tray with a well for power tools. 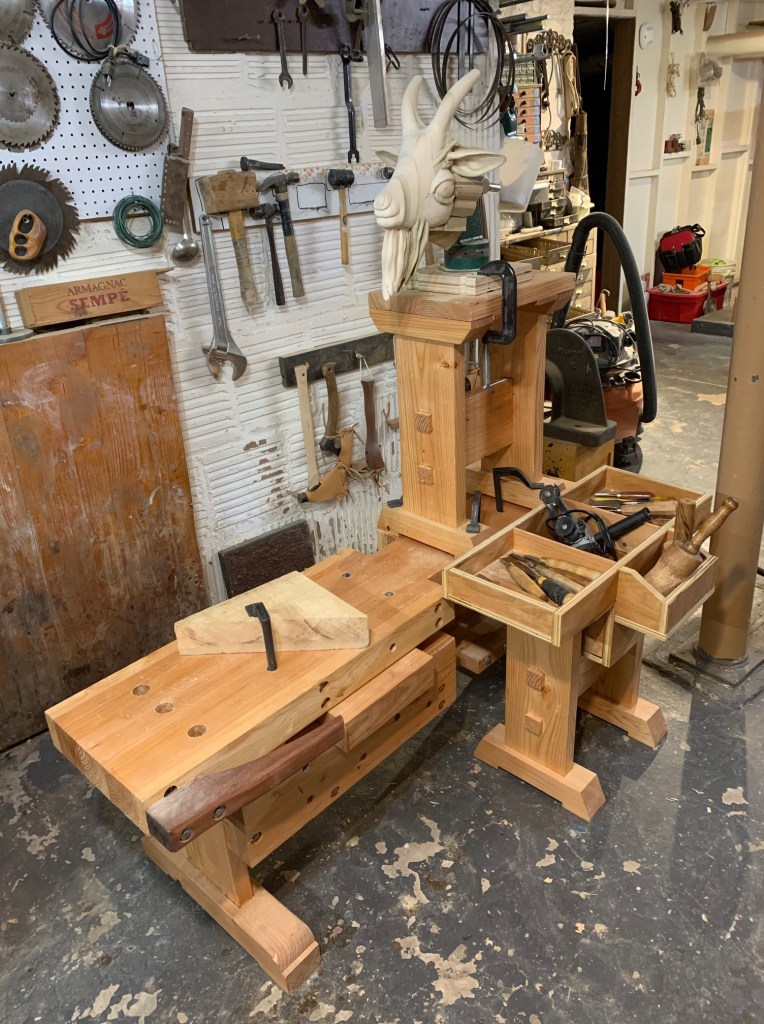
The saw horses can clamp to the top. Note the hold-fast on the block. 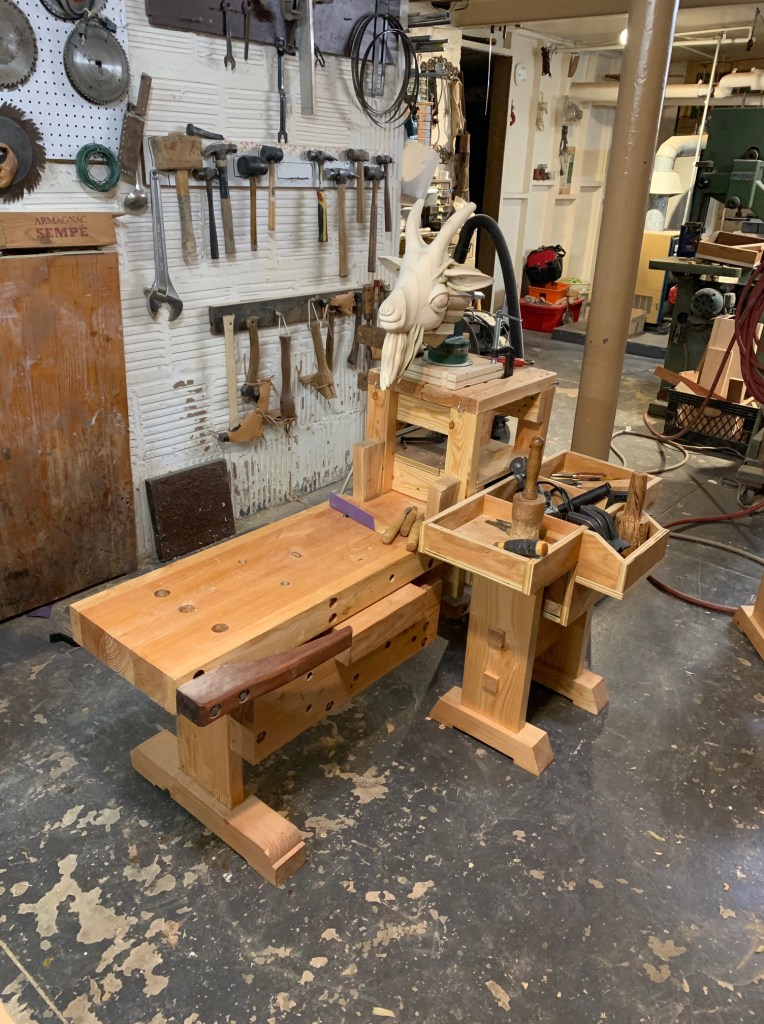
The little platform is the perfect height for working seated. The legs are held tight with wedges. 
You can shove two-by supports in the gap to gain a little extra work surface on either side or both. 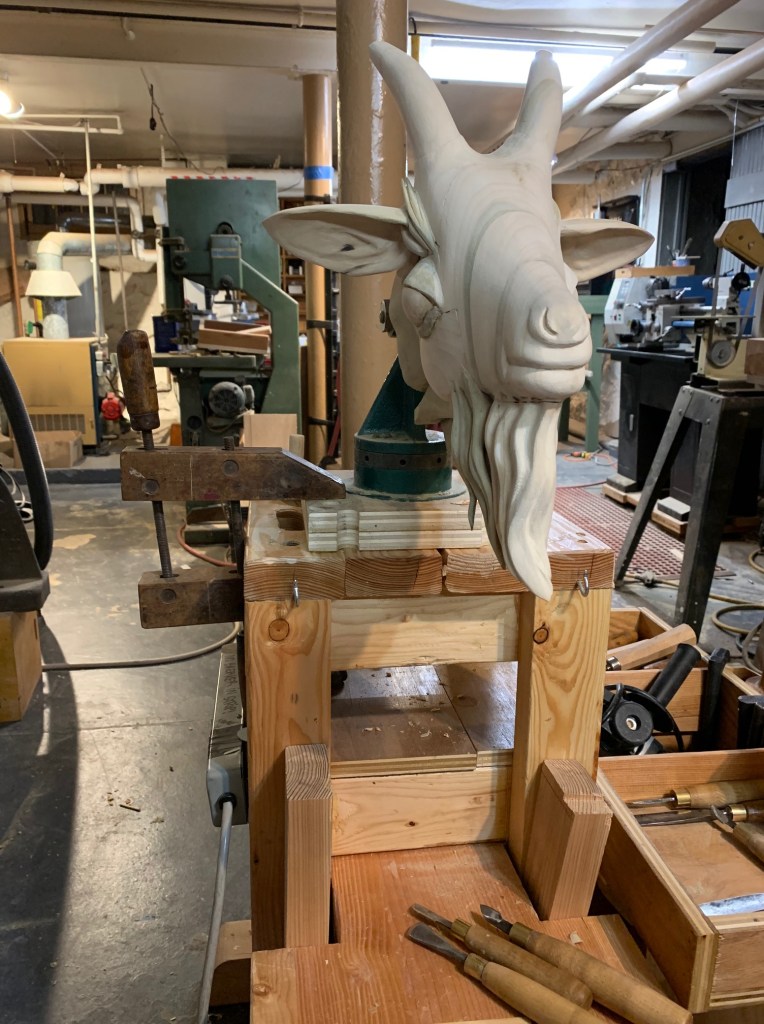
Working face to face
Design Concerns
The new bench has dimensions of the classic Roman bench: knee high, a foot wide, and a double arm-span long, give or take. But it will diverge from the classic design to make it stronger than it would need it to be for woodworking and more versatile.
It’s heavily built partly because heavy and low to the ground makes it stable but also because it’s expected to support not just planks but stone. A piece of marble one-foot by one-foot by the height of the bench weighs 350 pounds. I’d like to be able to put two or three times that weight on it.
Accordingly, we use trestles instead of legs and the bridge between the trestles is wide to resist racking if it is dragged and shoved around with a load on it.
It’s made of fir, which is softer than the traditional oak or walnut. Cheap is good, not only because I’m a cheapskate but because I don’t want the preciousness of hardwood to make me nervous about sawing into it or deter me from extemporaneously nailing or screwing something to it in an unforeseen aesthetic emergency.
Features
The bench has all kinds of work holding features.
- The top is accessible to clamps from all around. There is a minimum of several inches free all around the underside of the top and plenty of clearance below if I want to use C-clamps or Jorgensen clamps to fix things to the top.
- Holes in the top.
- The 1.5 inch round holes are for bench-dogs that can be used as stops you can push work up against, for instance, when planing a surface. These are extra large so that the pegs can be used for other purposes such clamping or tying.
- 0.75 inch holes are for bench hold-fasts that are used to pin work to the bench top. They can also take plain pegs. As time goes by there will be more.
- The hold-fasts and pegs let you use other auxiliary work-holding accessories such as a doe’s foot.
- The dark wood horizontal member bolted to the side of the top at the end away from the notches is called a “crotchet,” which is French for “little hook.”
- A vertical panel or a door up to about 2.5 inches thick can be held securely simply by sliding it into the crotchet.
- The tops of the feet are flat to provide a resting place for panels held in this way.
- The crochet attaches with two bolts so it’s easy to remove.
- The vertical 7.5″ by 24″ apron below the crochet and 1.5″ below the underside of the top lines up flush with the vertical sides of the bench top. The top of the apron is level with the top of the rail leaving a 1.5″ opening the full width of the top for most of the bench’s length.
- The apron is intended primarily for holding wood pinned in place by the crochet.
- It is 3″ thick with holes for either hold-fasts or pegs that can be used to support narrower panels and planks.
- It provides a place of attachment for any kind of vertical fixture using hold-fasts, clamps, or even screws. If it gets too beat up it’s easily replaceable.
- The 1.5″ space between the apron and the top:
- Accepts a removable sliding ledge for supporting very narrow boards edge up. It’s seen supporting a plank in one of the pictures.
- You can insert any 1.5″ plank through the slot and all the way across the underside of the bench. This allows attachment of a platform on one or both sides of the bench. (ibid).
- The four notches have multiple functions.
- Any plank up to about three inches thick can be held vertically in any of the notches by pinning it in place with a wedge (see the picture).
- Four notches allow four-legged accessory work surfaces to be securely mounted on the bench (ibid).
- Either of the notches on the crotchet side can hold a perforated post (not pictured) that sits on the floor and has holes that line up with the holes in the apron. Pegs or hold-fasts in these holes can be used to support long boards held at the other end by the crotchet.
- They allow C-clamps to reach into the middle of the work top.
Accessories
Matching Saw Horses
Traditional horses have one narrow rail, which means you usually need two. These have a pair of parallel trestles so that you can use just one sawhorse for many tasks.
The dual rails let a single horse double as a seat, a work-platform, a tool tray, or a modular holder for a vice or grinder. The rails each have a center hole and the accessories all have a corresponding dowel pin at the corresponding location so they won’t slide off.
Even with old fashioned 2×4 sawhorses, somehow you always end up using the 1.5″ rail as a convenient work surface or as a place to put down a tool. These rails are extra wide because people are never going to stop doing that.
The horses are the same height as the bench so that you can use them with the bench to support a large sheets of plywood for marking and cutting.
They are also intended to safely support scaffold boards either laid across the top or lower down clamped or across the rails. You can use the bench to anchor a scaffold plank held at the other end by a saw horse. When a plank is C-clamped to to both the horse and the bench it is almost impossible to upset.
The footprint of the saw horses is the same as the width of the bench top in one direction and the right length to fit into the notches in the other. This means that their half-inch high feet can drop into the notches and the sawhorse will sit on the relived area between the pads. When held down with hold-fasts or clamps a horse mounted in this way cannot slip and make rock-solid working platform at standing height.
If the Covid-19 restrictions ever end, I’m going to buy some one-inch MDF and make a set of standard plates to use as bases for the various vices, grinders, etc. that are around the shop so that a saw horses can serve as a pedestal for any of them.
Crummy Little Work Platform
Early on, I slapped together the little platform pictured above and below out of scraps from the trash. It was supposed to be temporary, just to try out the concept. It’s total crap that looks like whoever made it was drunk or depressed. Therefore it is entirely predictable that it would prove to be the most useful accessory by far.
It’s exactly the kind of accessory I had in mind. It is the right height for working seated using the carving vice. You can screw or clamp anything to the 2×4 top. It even has a power strip mounted on the side.
Ugly thought it is, I now know the exact requirements for a less horrendous replacement. When the quarantine ends I’ll buy another 4×4 and make a pretty one that looks like the saw horses. And maybe one just like it but half as high.
Materials
Except for the crochet, which was a scrap of sapele wood, the whole thing is clear Douglass fir dimensional lumber from the big box store, i.e. two-by.
Don’t sneer at fir two-by. The pale white, crap two by fours that you might be thinking of are sold as “hem-fir” which mean any mix of hemlock and fir. In practice that usually means all hemlock, which is pretty much the Wonder Bread of lumber: soft, white, bland, and not very strong. Douglas Fir is heavier, harder, much stronger and quite pretty if you varnish it. When it’s sold as fir and not hem fir it’s somewhat more expensive. The rough grain doesn’t paint or finish well like pine, but it’s great for anything you can leave rustic looking.
Rex’s bench cost $30. This one has a lot of wood in it so it was maybe $40 or so but the dumpsters of the world are full of wood that would be ideal for one of these. Old floor joists are great.
If you order a load of dimensional lumber delivered they take it off the top of the pile and most pieces will be full of knots. But there are always a minority of pieces that are almost perfect. Fortunately, the big box stores let you pick though it. Clear fir that is not dimensional ordered as such from a real lumber yard would cost you several times as much.
The caveat is that dimensional construction lumber for framing buildings kiln-dried but it is still quite wet compared to the wood you’d normally buy for woodworking. Therefore it is prone to shrinking. The good news is that it dries out pretty fast, especially if you put spacers between the boards and blow a fan on it. You’ll be amazed how much lighter it gets in two or three weeks.
The trick to making something out of fir an not have it look like it’s made of 2×4’s from Home Depot is to cut 1/8″ off of the edge with a table saw.. As soon as you do that it looks much more expensive.
Construction Notes (Bench)
The result looks nice, but it’s really just rough construction for hard use. The only joinery in the bench is the mortises in the feet. The rest is just glued and screwed so it goes together pretty fast.
As a confidence builder, I recommend you glue up the slab, cut it to length and square the ends nicely then use it bottom side-up as a work surface to build the rest on. That way you can be sure you’re getting the notches, battens, etc. in the right places. Leave cutting the notches until the end but pencil in their location so you’re sure you know how it works.
The Slab
The slab is glued up from three 4×4’s in the middle with a 2×4 on each side for a total of 13.5 inches wide. Mine is 57 inches long which seems about right. The sides that would become the top and bottom surfaces were trimmed slightly so the rounded factory edges wouldn’t appear as furrows on the top. For that reason it’s slightly thinner than the actual 3.5 inches of nominal four inch dimension lumber.
The 13.5″ width makes mounting the apron work out neatly and it is a comfortable size to straddle. If you want it a different width you’ll need to modify some details, primarily the apron. I’m quite happy with 13.5″.
Select the nicest clear pieces and arrange them for uniform grain. Glue up a rectangular slab. Don’t bother trying to form the notches by gluing up odd size pieces. When the glue has set scrape it off and plane it flat on the bottom. If you’ve been careful it shouldn’t take much planing. You can plane the top after it’s put together.
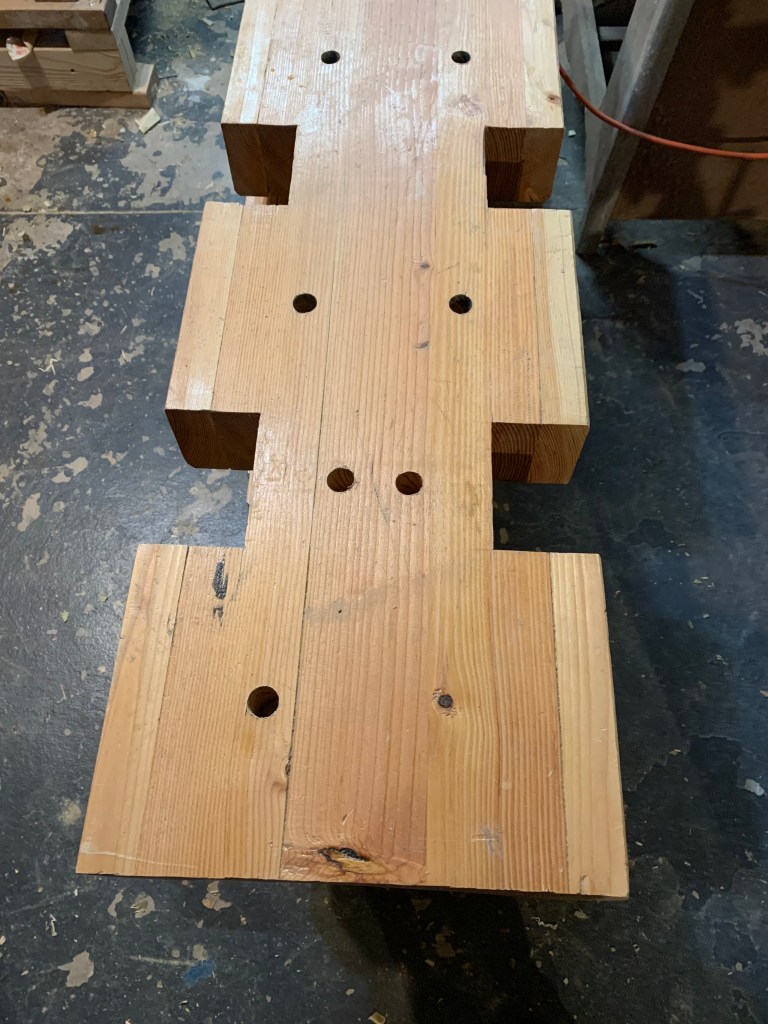
Three 3.5″ pieces with 1.5″ on the outside makes 13.5″. 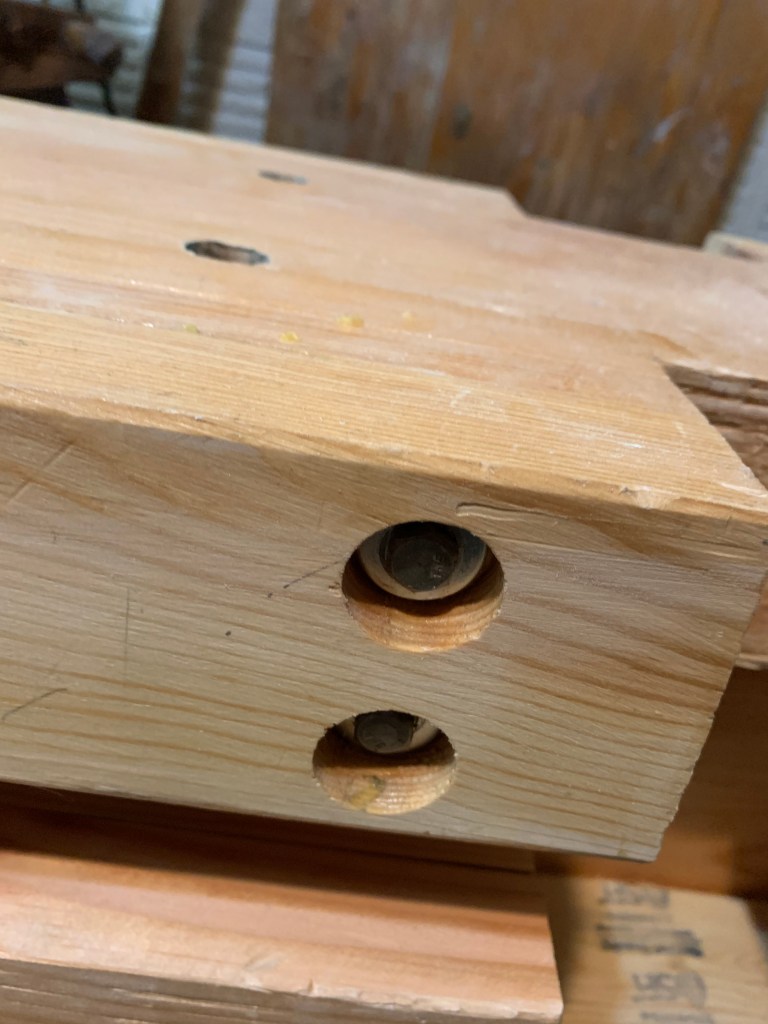
Counter-bored holes for lags. Six inches isn’t a problem but if they go more than halfway you have to offset the positions on the other other side. 
Note lags on each side of each notch, on both ends, and in the middle. Top of apron and top of bridge align with gap except where the battens under the top rest on it.
Fasteners
You don’t absolutely need the bolts through the sides of the top. Yellow carpenter’s glue all by itself is extremely strong; the top would be more likely to split at a random place than on a glue line but around the notches could be vulnerable. Therefore I reinforced mine from both sides with six-inch long stainless steel 3/8″ lag bolts that have been taking up shelf space in the shop for 20 years or more, left over from building a boat. I’m getting down to my last few hundred now.
You don’t need such splendid screws. Cheap 1/4″ lag screws or a continuous piece of threaded rod all the way across would also be fine. Drill for lag screws after it’s glued up. Drilling the counter-bores first makes it easy to center the holes. For rod, drill them the wood one piece at a time, preferably on a drill press. Dry fit it together and clean it up any minor misalignment with a long bit before gluing. Either way, be sure to insert the rods before you tighten the clamps so they align.
The very best way to bind the top together is to use smooth, non-threaded rod of the correct size for the bored hole, and thread both ends yourself with a die. If you don’t know how to use a die, it’s a great skill to have!
The Notches
Important detail: You might want to wait and cut the notches at the very end when it’s all assembled but read this and mark the locations so you’re clear where the notches and battens have to go, etc.
Important detail: Cut notches three inches deep into the bench and four inches long using a tenon saw. The 3.0 inch number is important for reasons explained below. The cuts that run the long way are chiseled out from both sides after drilling a row of holes near the chisel line. If you use a Forstner bit for the holes they can touch or even overlap. A spade bit is faster but the holes can’t touch.
Mark the line deeply with your chisel on both top and bottom then chop out most of the waste and clean up the last little bit with a chisel, again from both sides, being careful to keep it square to the top.
Important detail: The notches are square on the long side that aligns with the top and square on the end that is farthest from the crochet. The end nearest the crochet is cut at a five degree angle so wide end is up. This is to match wedges that are cut at the same angle. The angle allows the wedges to transfer pressure to the entire thickness of the opposite side. An angle of five degrees will let the wedges cinch tightly but it is wide enough that a wedge will work on a range of thicknesses.
Important detail: Note square sides of the outer pair of notches align with the batten on the bottom to which the legs are attached. See middle picture below. My bench is 57 inches and the legs are 46.5 inches outside to outside. I’d make legs 43.0 inches if I were doing it again to get a little more overhang on the ends. I’d like a little more room for hold-fast holes.
Legs are 2×8’s in glued into 1.5 inch deep mortises and screwed from below. Feet are releived in the middle to leave square pads. Tops are flat. 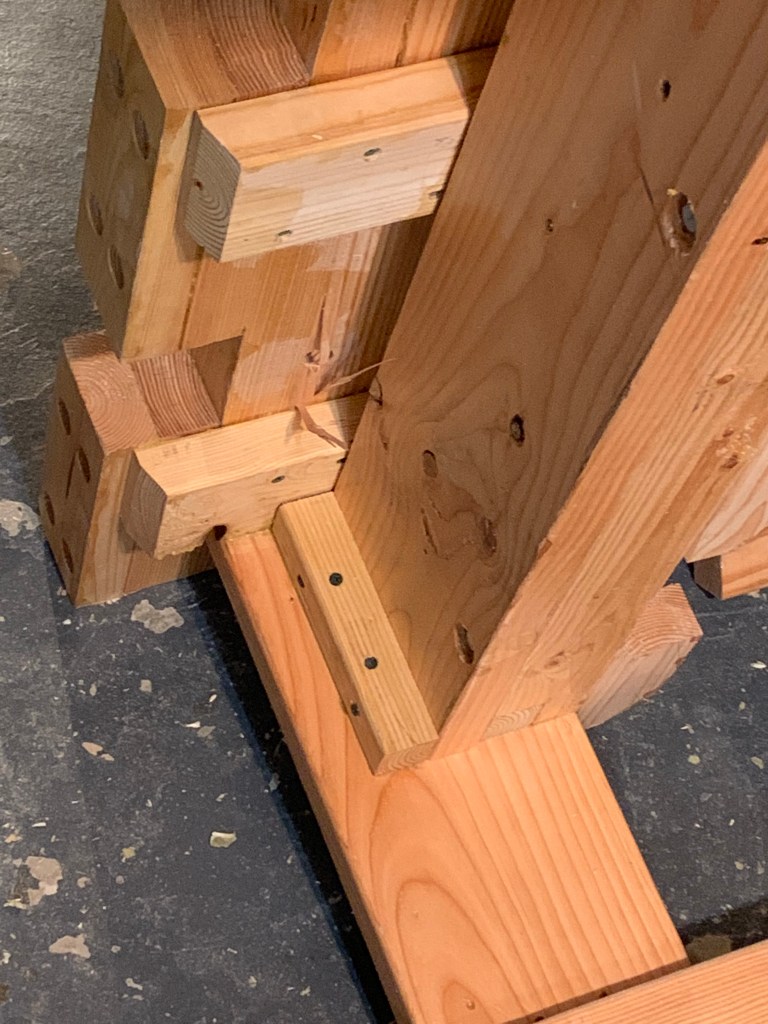
Note the locations of the battens across the underside. They sit on the bridge leaving some space. Notch to exactly 3 inches from bridge. 
Lower bocks screwed to spacer sized to align with back side of notches.. Space 
Note the 3″ spacer laminated to the rail. The apron attaches to it on the left, out of the frame, and the alignment blocks under the notches (shown) screw to it on this end. The blocks have oblong holes to give few millimeters of adjustment. The long side of the two notches above line up exactly with this rail.
The Trestles
Feet are nominal 4×4 cut down to a 3″x3″ actual size. Leave them mostly flat on top except for the outside corner. They are relieved 0.5″ in the middle leaving square pads on the ends so they sit flat. You could also glue a 3″ square of half-inch stock for feet.
Important detail: The legs are 2×8’s but don’t trim off the factory edge. Leave them 7.5″ wide. They are glued into 1.5″ deep mortises in the feet and screwed with heavy construction screws up from the bottom. Mark the mortise positions and hollow them out with a 1.5″ Forstner or spade bit then clean up with a chisel.
Cut the legs to a length that is the height you would kneel on minus 3.25 inches for the top and 1.5″ for the part of the foot below the mortise. My bench is 22.5″ high so I cut the legs to 17″ inches.
I did not mortise them into the top, but it wouldn’t hurt. If you choose to do so, make them longer to allow for the part that goes into the mortise. Mine are just glued and screwed to battens that are screwed to the top without glue. The holes are over-large to allow for a little expansion and contraction of the top.
The Apron
Important detail: The primary purpose of the apron is to provides a place to put pegs and hold-fasts for planks to be secured by the crochet for planing edges, etc. Therefore it must align with the vertical side of the top. If you use the recommended five pieces for the slab it should just work out.
The top should be 13.5″ wide. Subtracting 7.5″ for the leg leaves 6.0″ which is 3″ on each side between the outside of the leg and a plane flush with the side of the top. Most conveniently, that’s exactly the thickness of two pieces of 2×8. It’s doubled so that it will be thick enough to use hold-fasts.
Cut two nice pieces of 2×8 of the length from the outside of the back leg to a line plumb with the near side of the nearer notch. On mine that is 24.5″ but yours might be slightly different. Get one side of each flat with a plane and glue them together to make a single slab 3.0″ thick. If you don’t have clamps you can simply screw them tightly together with construction screws until it’s dry. Don’t forget to remove them later.
Also rip a 3.0″ piece of two-by to glue and screw to the full width of the bottom of the rail from leg to leg (apron side only.) End screw it though to the legs as well with long construction screws. The end of the apron is bolted to the leg and the bottom of the apron gets bolted to this spacer, which also provides the place of attachment for the adjustable blocks that line up with the square end of the notches.
If everything is correct, the space that the spacer fills should be 1/2 of the leg width minus 1/2 of the thickness of the rail, or 3.0″ and there should be exactly three more inches from the plane defined by the spacer and the leg to the plane that aligns with the outside edge of the top. Also glue and screw a 3.0″ thick vertical spacer to the rail a few inches in from where the apron will end to provide something to bolt the apron to on the end that does not attach to the leg.
Even if you measure perfectly the wood can move a tiny bit from humidity and/or drying causing the apron to go out of alignment with the edge of the top. Not a problem. If the apron is too low you can loosen the attachment bolts and shim it out slightly. If it’s too high it can be touched up with a plane. Leave this kind of tuneup after it’s been around the studio long enough to be completely acclimated.
Holes
The holes are all drilled with Forstner bits because I happen to have a set but cheapo spade bits in a power drill would be fine and so would augur bits turned by a brace. Buy your hold-fasts and use whatever size they specify.
I made a few 1.5 inch holes at the end for plane stops. That’s much fatter than you need for planing, but I wanted to be able to use very beefy pegs so I could also use them to anchor heavy stone and for other purposes as well. I guessed at where I might want some hold-fast holes. I’ll drill some more as needed.
Mind where you put the holes so they don’t bump into anything below.
Wrapping Up
I lightly sanded the assemble bench and gave it a couple of coats of shellac. The finish makes it look better and it seals out humidity. I used shellac because I had it; urethane or other varnish would be fine. Boiled linseed oil or tung oil are ok too, but you need to renew oil frequently which seems rather fancy for what is basically a glorified sawhorse.
I’ve been assuming the reader knows how to build this just by looking at it. That may not be true for everyone. Next piece, public health authorities permitting, I’ll make that work stand. It’ll use all the operations necessary to build any of it.

Beautiful Pete!
LikeLike